Add new actions
If any of the hundreds of different actions currently available still does not suit your needs, that's okay. You can easily extend ZeuZ Node by adding new actions to it or even better, contribute to our repository so that everyone has access to them! Follow this guide to learn how you can create a new action very easily.
Our built in actions are called sequential actions.
Decide the type of action
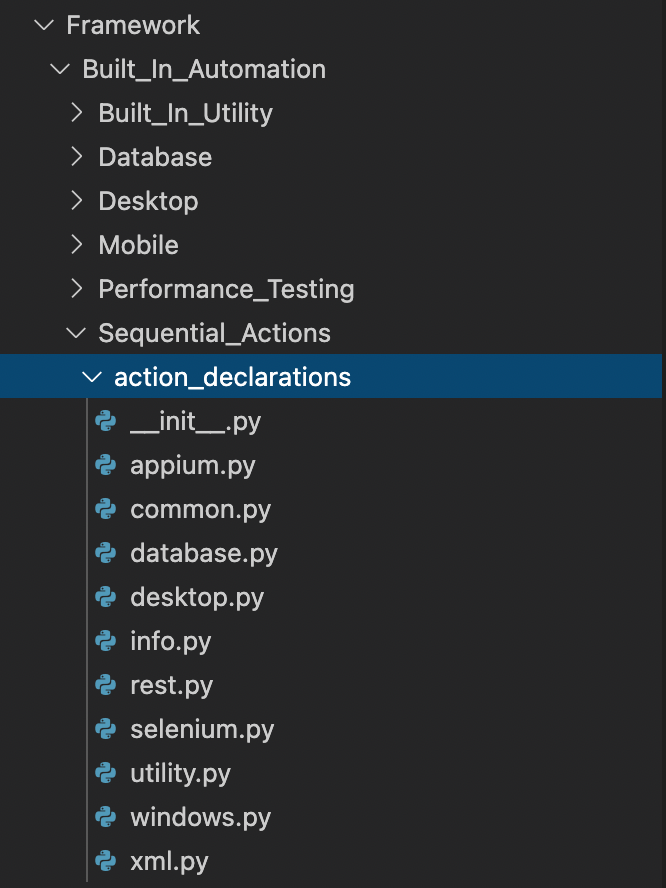
You first need to decide which category your new action will belong to. For example, if you're trying to write an action for web automation, it should go into the Web/Selenium category. Find the "action_declarations" directory/folder inside "ZeuZ Node > Framework > Sequential_Actions".

Each of the files listed above are a mapping of the following type of actions:
- Mobile actions (Android/iOS) > appium.py
- Web actions > selenium.py
- Common (common to all categories) actions > common.py
- REST API actions > rest.py
- Desktop (Win/Linux/Mac) actions > desktop.py
- Windows only actions > windows.py
- Database actions > database.py
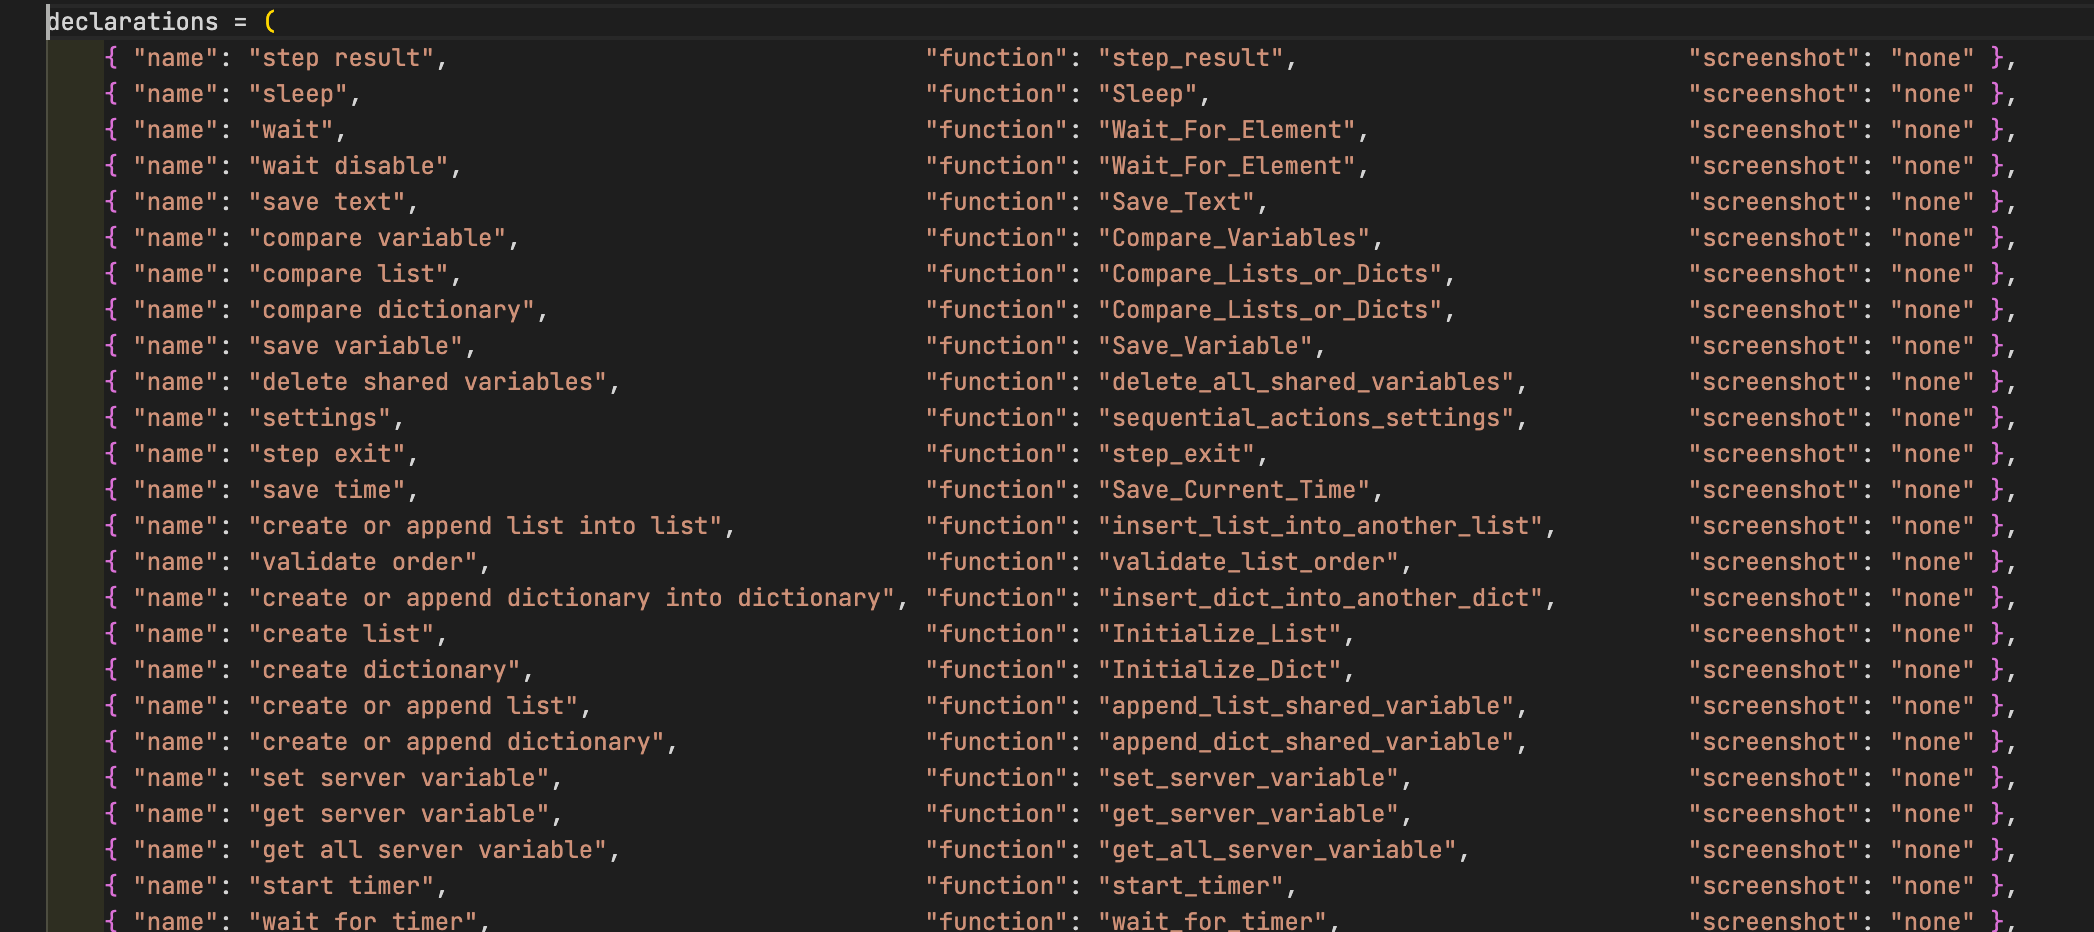
In this guide, we'll write a simple common action that will just output the message "Hello, {your name here}" in the console. So, open the "common.py" file and you'll see something like this:

This is a list of all the available common actions. In each of these rows,
namedefines the name of the action,functiondefines which function to call in the code when this particular action is added. You can also see ascreenshotkey, this defines the type of screenshot that this action should perform (take a screenshot of the desktop, mobile, the browser ui or none at all). This is where we'll declare our action. We'll come back to this file later.Write the action
Time to write the actual code for the action! Common actions live in the "ZeuZ node > Framework > Built_In_Automation > Sequential_Actions > common_functions.py" file. All actions have the same code skeleton. Add the following code to add our new
hello_nameaction.Declare the action
Next, you'll have to declare the action in "common.py" file mentioned in step #1. Add the following at the very end of the
declarationstuple:This will make our action available to execute when we add them from the server.
Execute action
Now that you have written the action, it's time to run it and see how it works. Create a new test case and go to the steps tab. From there, add any action. Modify (add/remove) rows to make the action look like the following:

Save the step and run your test case to see if its producing the output you expected.