How to create Documents
Description#
What does Document mean in software testing?#
In software testing, document refers to the documentation of artifacts that should be developed before or during the testing of software.
Test documentation helps in estimating the testing effort required, test coverage, requirement tracking/tracing, etc.
How to Create/Edit Document?#
At the first step, we need to Enter the Title of the document.
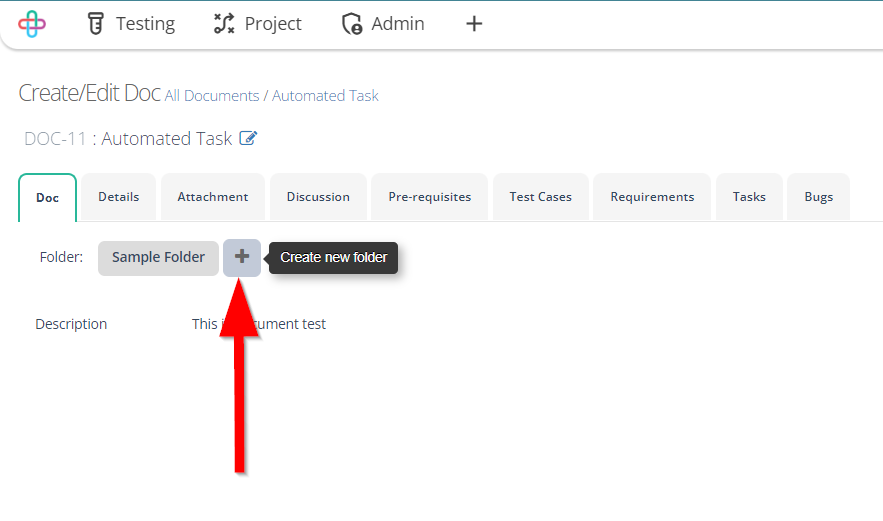
After that, we need to select a Folder and for a new folder, click on the Plus sign(+) and create a new Folder.
Then there is a Description box where we need to write a description.
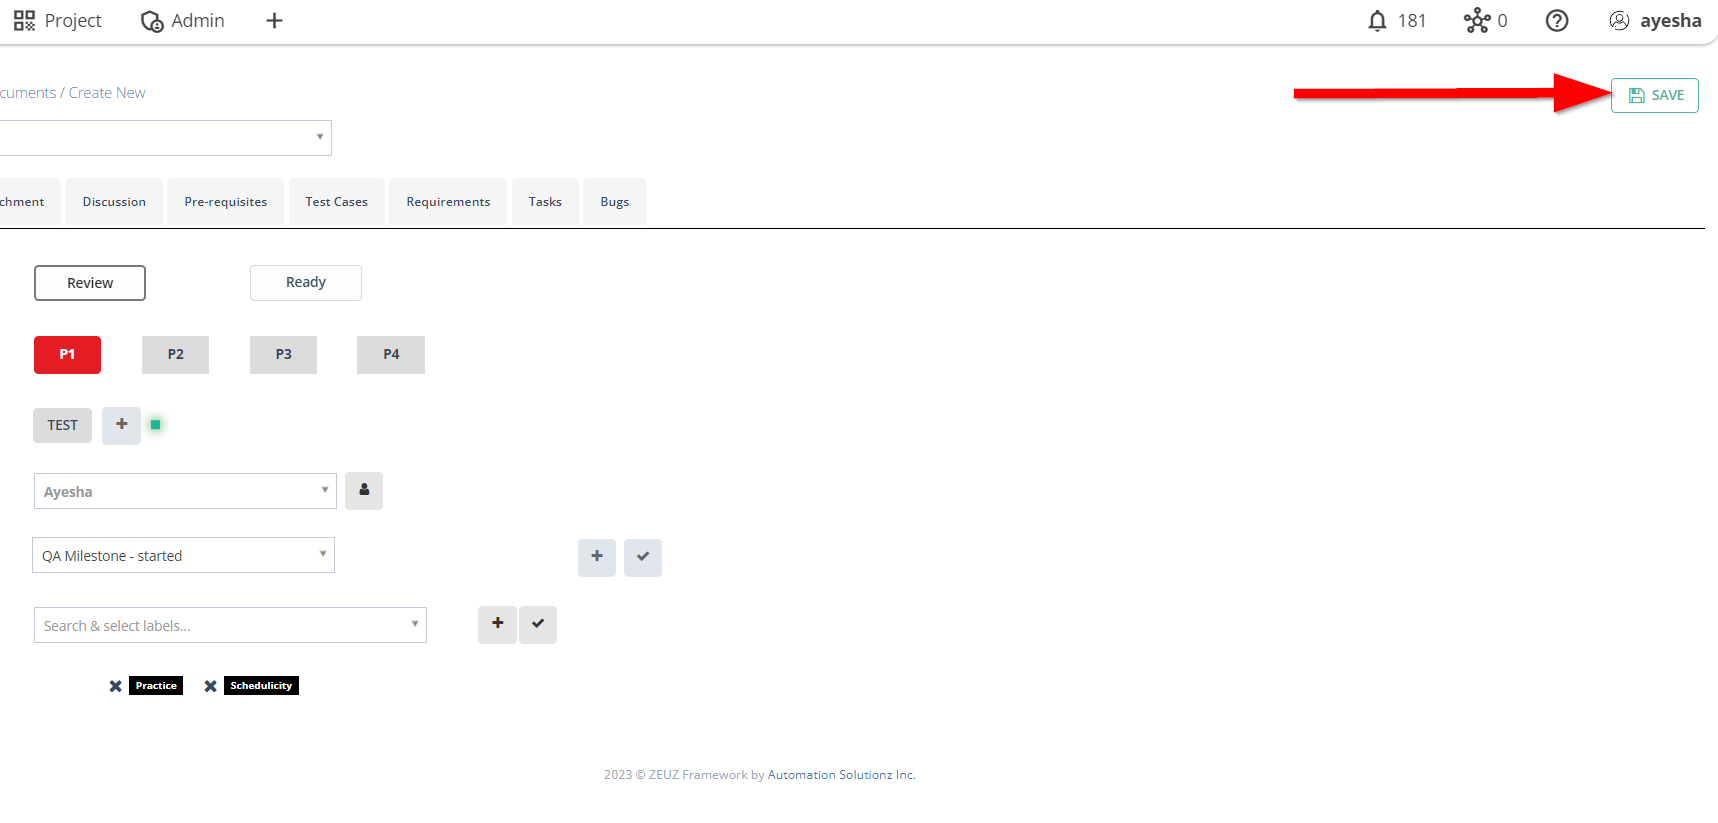
Next click on the SAVE button at the top right side of the page and the Doc will be saved with Description, Folder and Title.
What is the importance of the Document in software testing?#
Documentation is highly important in software testing due to its role in ensuring clarity, consistency, traceability, knowledge transfer, and compliance. It helps testers and stakeholders understand the testing process, maintain consistency in practices, and establish traceability between requirements, test cases, and defects.
Documentation supports knowledge sharing, assists in test maintenance and regression testing, and provides evidence for compliance and audits. It facilitates effective communication, decision-making, and transparency among team members.
Overall, documentation enhances the testing process by providing guidance, promoting understanding, and supporting quality assurance practices.
Steps#
- From the Menu bar, go to the Project then Document option.
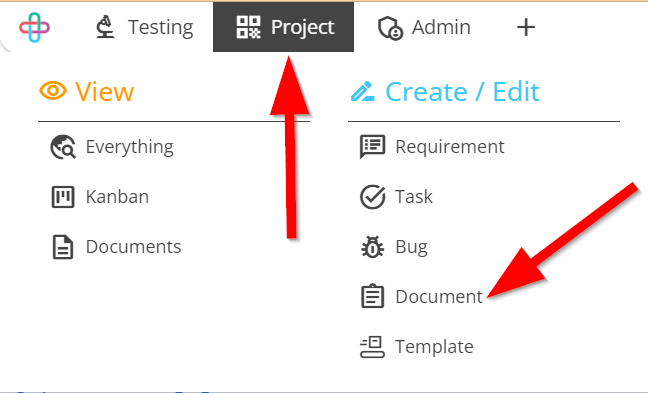
- Go to the Create/Edit Document page.
- Enter the title of the document.
Entering the Title of the Document is essential to provide a descriptive and identifiable name for the test case, facilitating effective documentation and management.

- Go to the Docs tab.
- Select the Folder.
Selecting a Folder is necessary to categorize and organize them systematically for easy retrieval and management within the testing process.
- Click and write the Description.
Writing Description is crucial to provide context, details, and explanations that enhance the understanding of test cases, issues, and documentation, facilitating effective testing and collaboration.
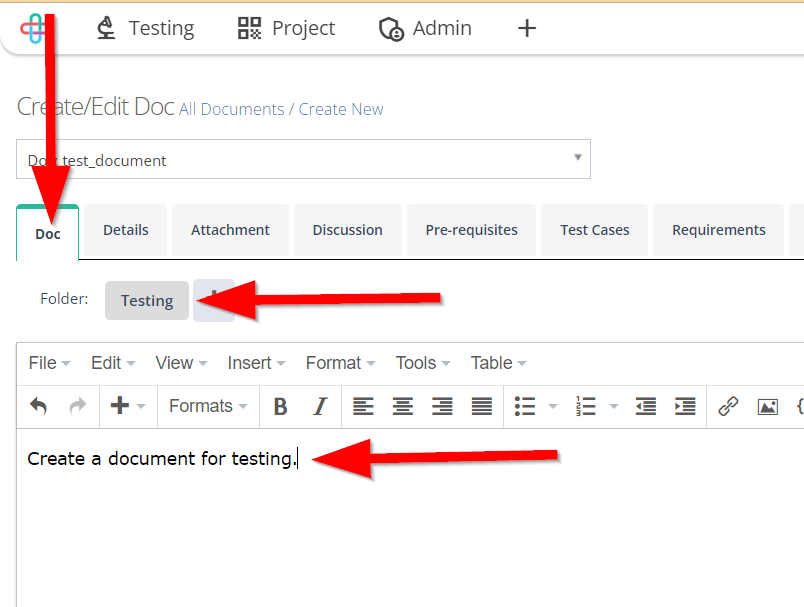
- Click on the Save button.

Details Tab#
Description#
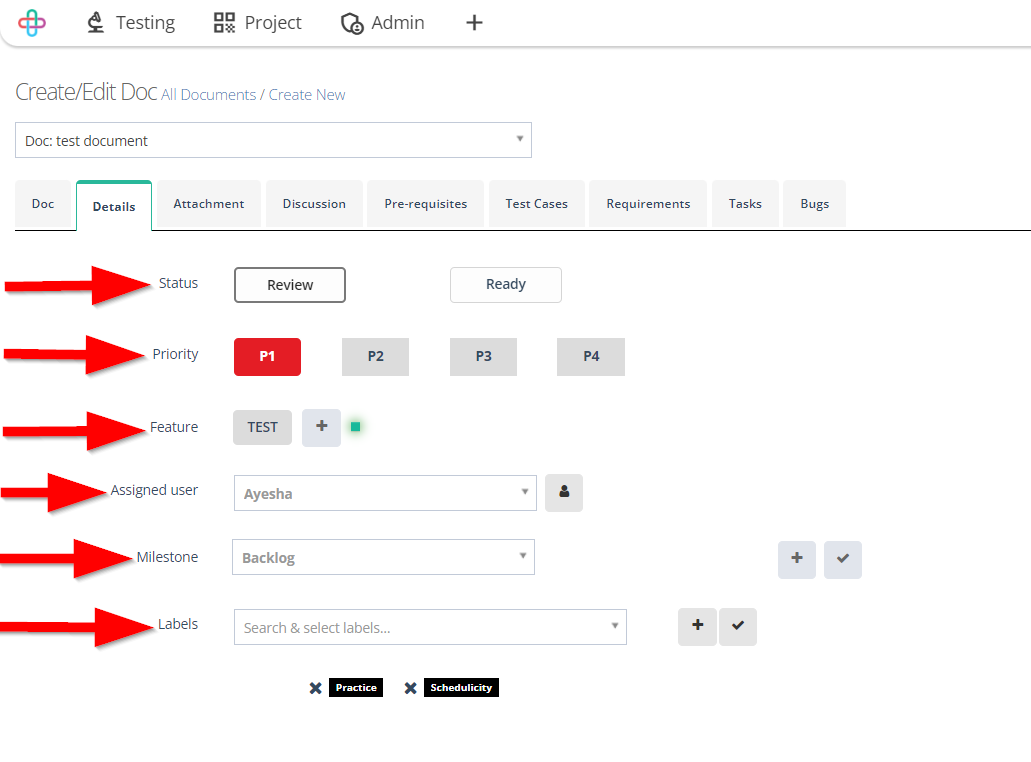
Status: Two types of button are available one is Review and another one is Ready.
Priority: During the edit of test cases, we need to select the priority, similarly for the creation/edit of a document, we also need to select the priority of it among P1, P2, P3 and P4.
Feature: Click on Choose Feature button and select the feature and at the right side of it there is a plus sign '+' which helps to create a feature.
Assigned User: We can assign a user just by clicking on the Assigned User field and can assign him/her as a user and another button is available at the right side of it called Set as Triage.
Milestone: Then we need to fill up the Milestone field. However, the plus sign '+' indicates Create new milestone and the tick sign indicates Make individual default milestone.
Labels: For selection of label, click on Label field and select label. However, for a new label, click on plus sign '+' which indicates Create new label and for default label, click on tick sign which indicates Make individual default label.
note
After saving the Document, on the right side of the page the information remains, such as:
- Created by
- Created on
- Last modified by
- Last modified on.
And at the top right side of the page three buttons are available:
- New Doc
- Delete
- Copy.
Steps#
- Go to the Details tab.

Fill up the information of Details tab like:
- Status (Review, Ready): Having two type of statuses like Review and Ready allows for clear differentiation between documents that are in the review process and those that are finalized and ready for use, aiding in effective document management.
- Priority (P1, P2, P3, P4): Assigning Priority levels (P1, P2, P3, P4) helps in categorizing and addressing documents based on their importance and urgency, facilitating efficient document management and workflow.
- Feature: Assigning Features helps organize and classify documents based on the functionalities or components they are related to, aiding in effective documentation management and traceability.
- Assigned User: Assigning a User designates responsibility and accountability for that document's content and updates, ensuring clear ownership and coordination in the documentation process.
- Milestone: Assigning a Milestone helps track progress, align documentation with project phases, ensures timely delivery of relevant information.
- Labels: Labels in documents provide categorization and easy retrieval, aiding in organizing and managing documentation effectively in software testing.
- Click on the SAVE button.
Attachment Tab#
The Attachment tab allows users to upload and manage related documents directly within the platform for seamless project and test management.
The Attachment tab is essential for document management as it helps users store relevant files, such as test cases, project specifications, or results, within the platform itself. This feature ensures that all necessary documentation is easily accessible to team members, promoting better collaboration, version control, and traceability during project or test management workflows.
Steps#
- Go to the Attachment tab.
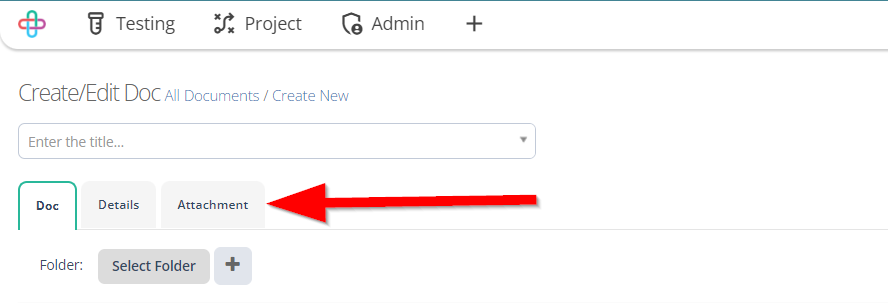
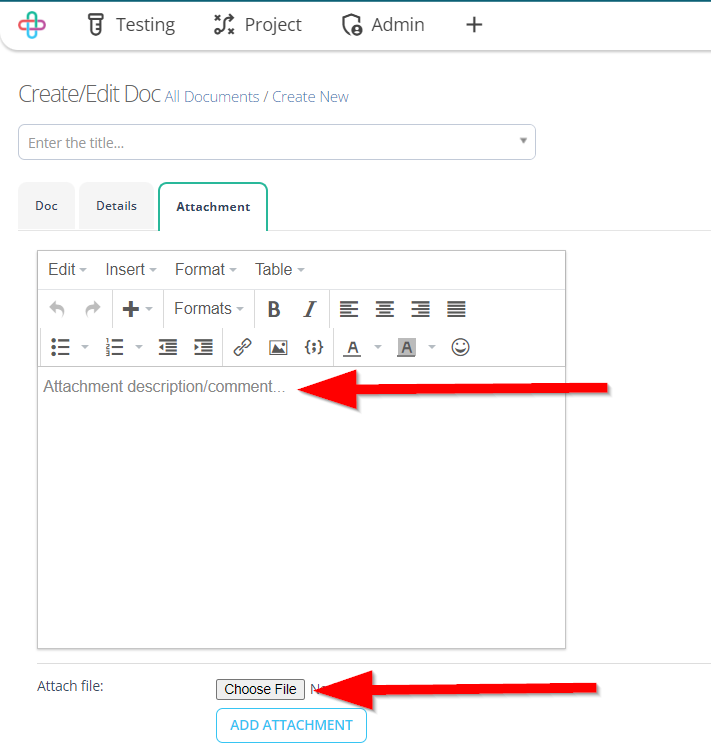
Fill up the information of Attachment tab like:
- Attachment Description/Comment: Writting an attachment description or comment is necessary to provide context and clarity for the attached document. It helps to understand the purpose, relevance, or specific details of the file without needing to open it.
- Attach File (Choose File): The Attach File function allows users to upload and link relevant documents to tasks or test cases.
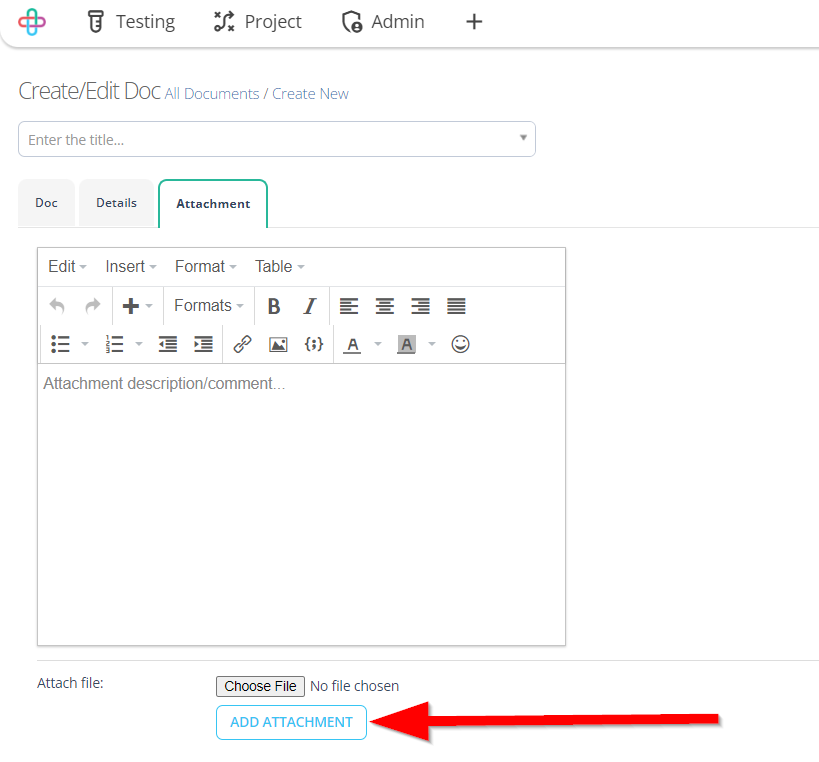
- Click on the ADD ATTACHMENT button to add the choosen file.
How to create New Root Folder#
Description#
The New Root Folder is a primary folder created to organize and store documents or files at the top level of a directory. It serves as the main folder under which other subfolders and files can be created and structured. This helps in categorizing documents, improving file organization, and enabling easier access to relevant files within the platform. It ensures that documents are systematically stored and retrieved efficiently.
Steps#
- Go to the Create/Edit Doc page of an existing document.
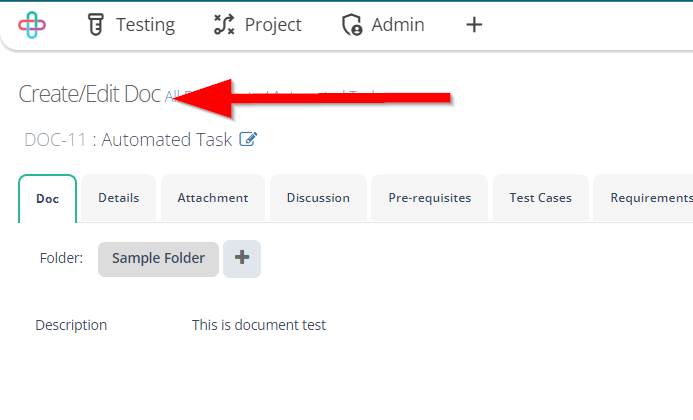
- Click on the Create new folder (+) button.
Next go to the Documents page.
Click on the + New Root Folder button.

Give name of the New Root Folder.
Click on the OK button and the folder will be created.
