How to setup Work Schedule
Description#
What is the meaning of Work Schedule in software testing?#
In software testing, a Work Schedule is a structured plan that defines the timeline for various testing activities and tasks within a testing project. It specifies when and how different testing activities, such as test case creation, execution, and reporting, will be carried out.
Work Schedules help project teams like allocate resources, manage time effectively, and meet project deadlines. They are essential and coordinating the testing process to ensure its successful completion.
Importance of Work Schedule in software testing#
A Work Schedule is indispensable in software testing due to its multifaceted role. It facilitates effective time management for testers, allowing them to prioritize tasks and meet deadlines efficiently.
Additionally, it aids in resource allocation and tracking progress, ensuring that testing phases adhere to predetermined timelines. This schedule acts as a vital communication tool, reducing misunderstandings within the team and enhancing collaboration. It also plays a pivotal role in risk management, allowing for proactive measures to mitigate potential delays or issues. Moreover, it contributes to quality assurance by providing adequate time for thorough testing, ultimately improving software quality.
Finally, adhering to a Work Schedule helps meet client expectations and maintain satisfaction by delivering projects on time.
What is the purpose of setting Work Schedule in software testing?#
A Work Schedule in software testing serves multiple essential purposes.
Firstly, it facilitates effective time management, ensuring that testing tasks align with project timelines.
Secondly, it aids in resource allocation, optimizing productivity by distributing resources efficiently.
Thirdly, it enables progress tracking, helping teams identify delays and take corrective actions promptly.
Additionally, the schedule acts as a communication tool, reducing misunderstandings among team members. It also supports risk management by proactively addressing potential issues. Quality assurance benefits from the schedule by allocating ample time for thorough testing and defect resolution.
Lastly, meeting client expectations and delivering projects on time is crucial for client satisfaction and maintaining a positive reputation in industry.
Steps#
- From the Menu bar, go to the Project then Work Schedule option.
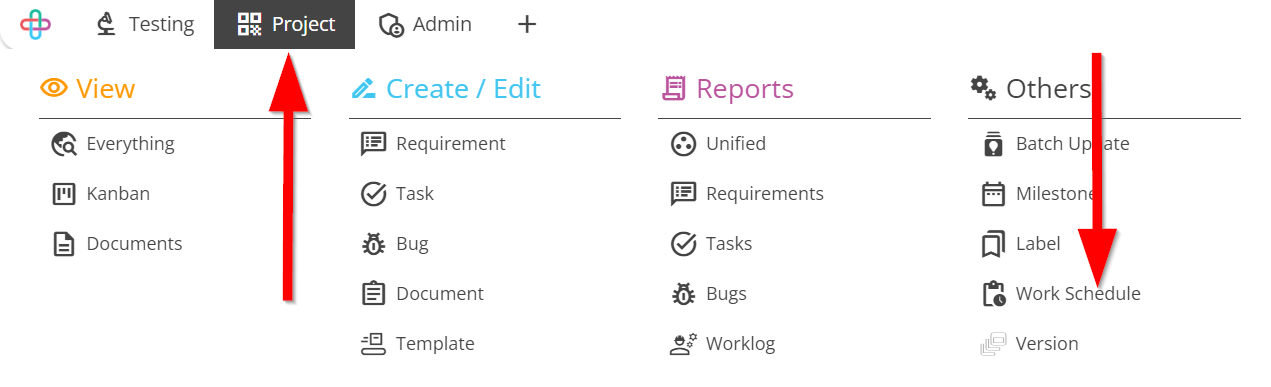
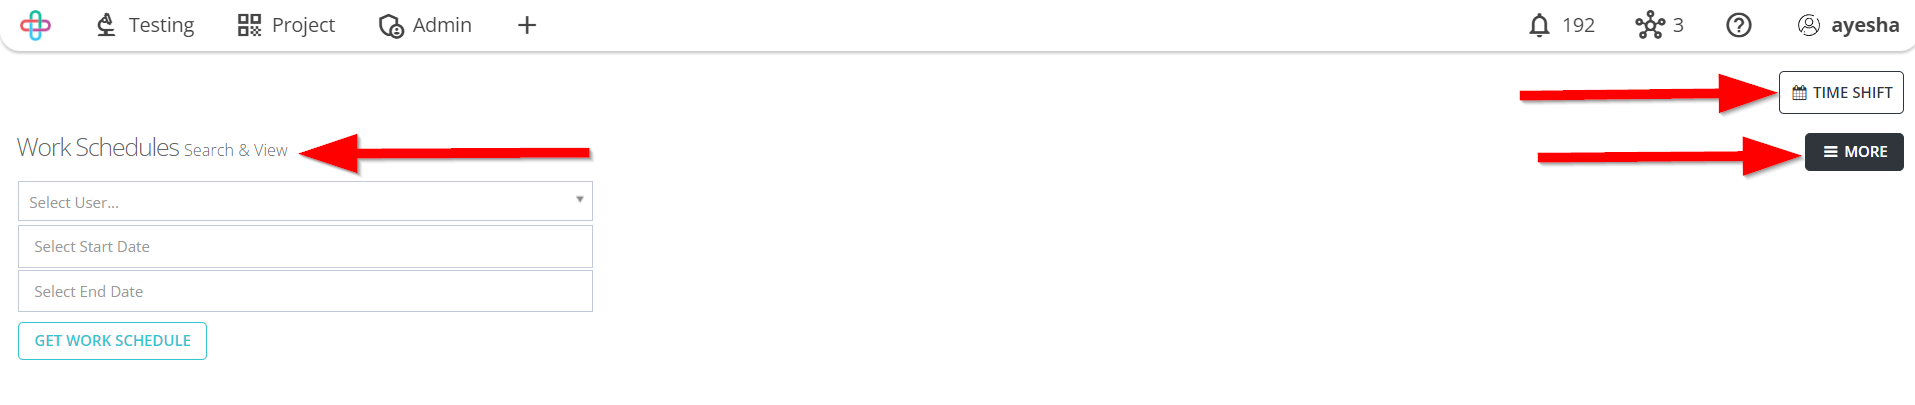
- Go to the Work Schedules page.
- Click on the MORE option.
Clicking on the MORE option typically provides access to additional settings and functionalities, allowing users to customize and manage their schedules more comprehensively.
- Then click on the TIME SHIFT option.
The TIME SHIFT function allows users to adjust or offset the scheduled time for tasks or activities, accomodating different time zones or specific scheduling needs.
- Go to the Time Shift page.
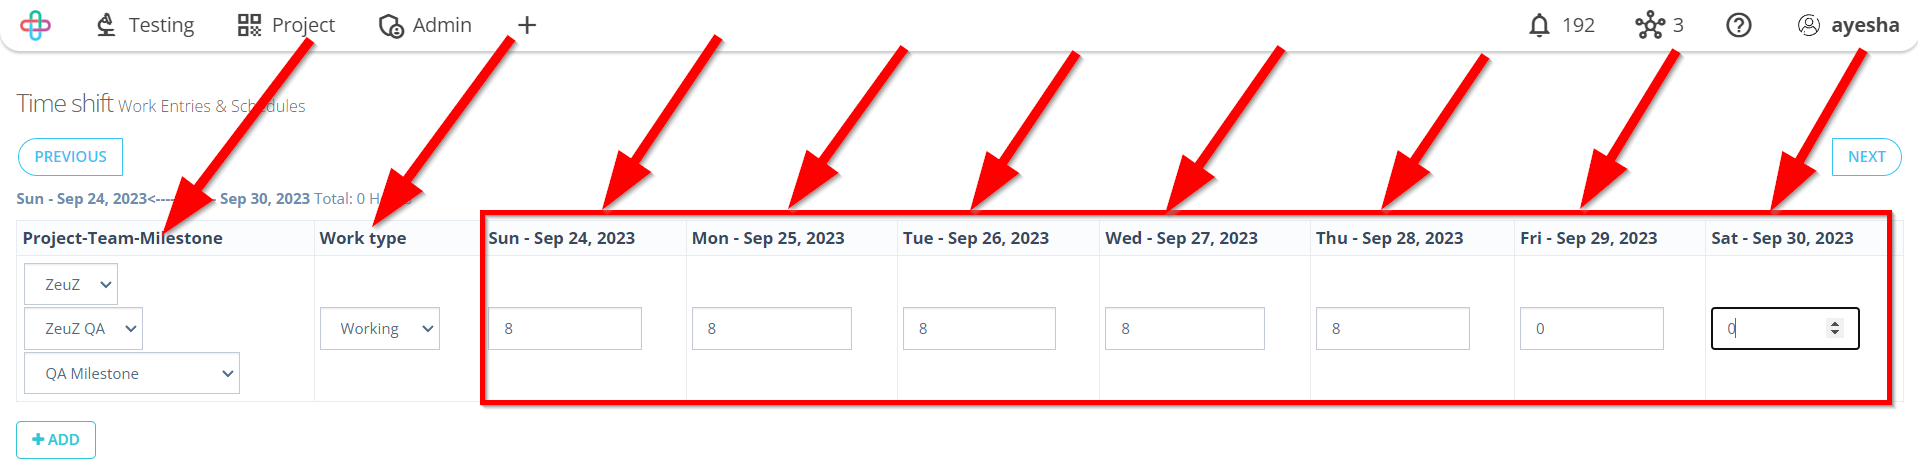
- Select the Project, Team and Milestone.
Selecting the Project, Team and Milestone ensures that tasks are properly allocated, tracked, and meet project-specific objectives and timelines.
- Select the Work type.
Selecting the Work type helps categorize tasks and allocate resources efficiently based on the nature of the work, such as testing, development, or documentation.
- Enter the Working hours.
Entering Working hours is essential to accurately plan and track the time spent on different tasks, ensuring efficient project management and resource allocation.
- Click on the SAVE button.

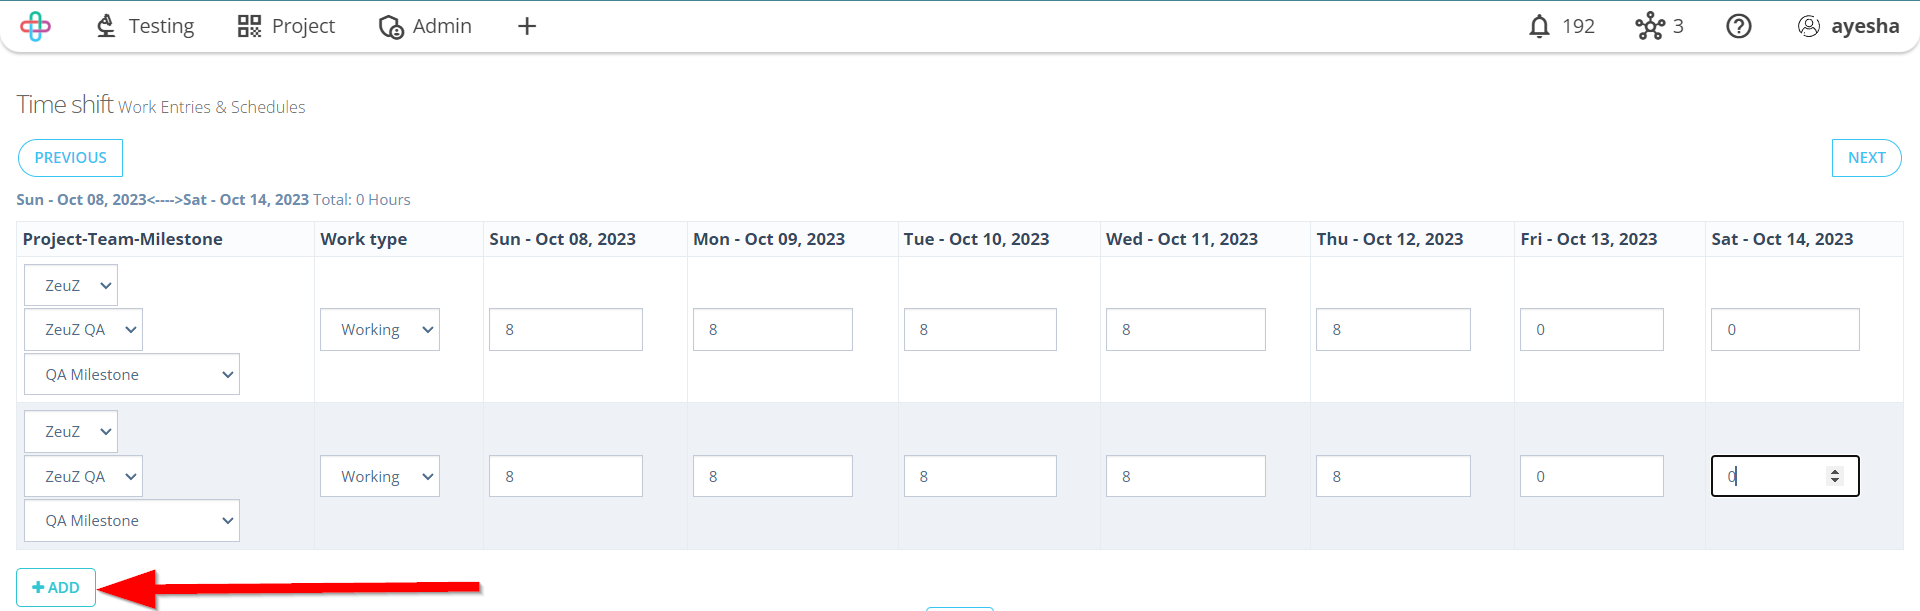
If it is needed to add another work schedule then click on the ADD button.
Adding another Work Schedule may be necessary to accommodate different project phases, teams, or specific tasks that require unique time allocations and resource management.
The ADD button allows you to create new work schedule entries to specify working hours and allocate resources efficiently for various tasks in software testing.
- Again go back to the Work Schedules page.
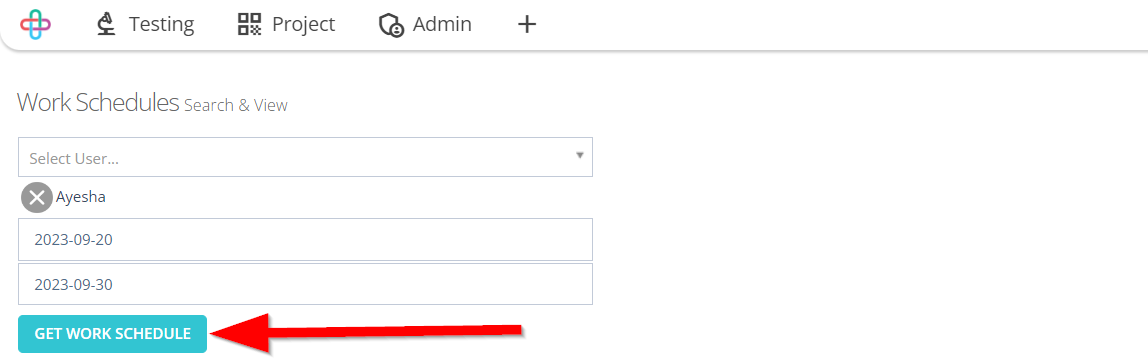
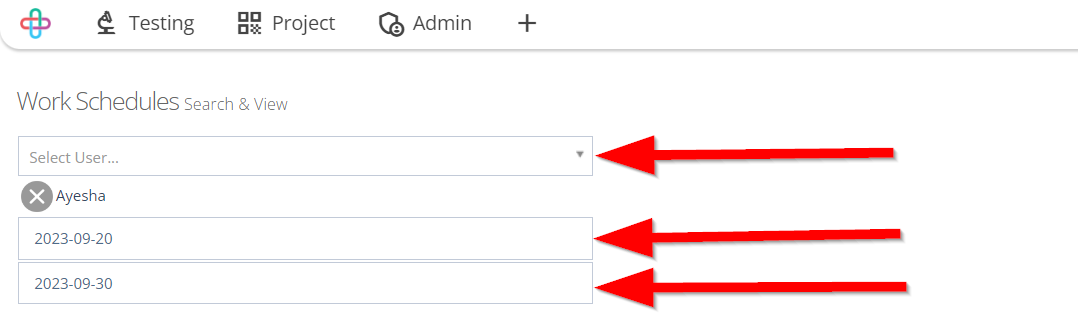
- Select the User.
Selecting the User is essential to aasign specific team members to work on designated tasks, ensuring proper resource allocation in software testing.
- Select the Start Date and End Date.
Selecting Start Date and End Date defines the timeframe for which the schedule applies, aiding in effective planning and resource allocation.
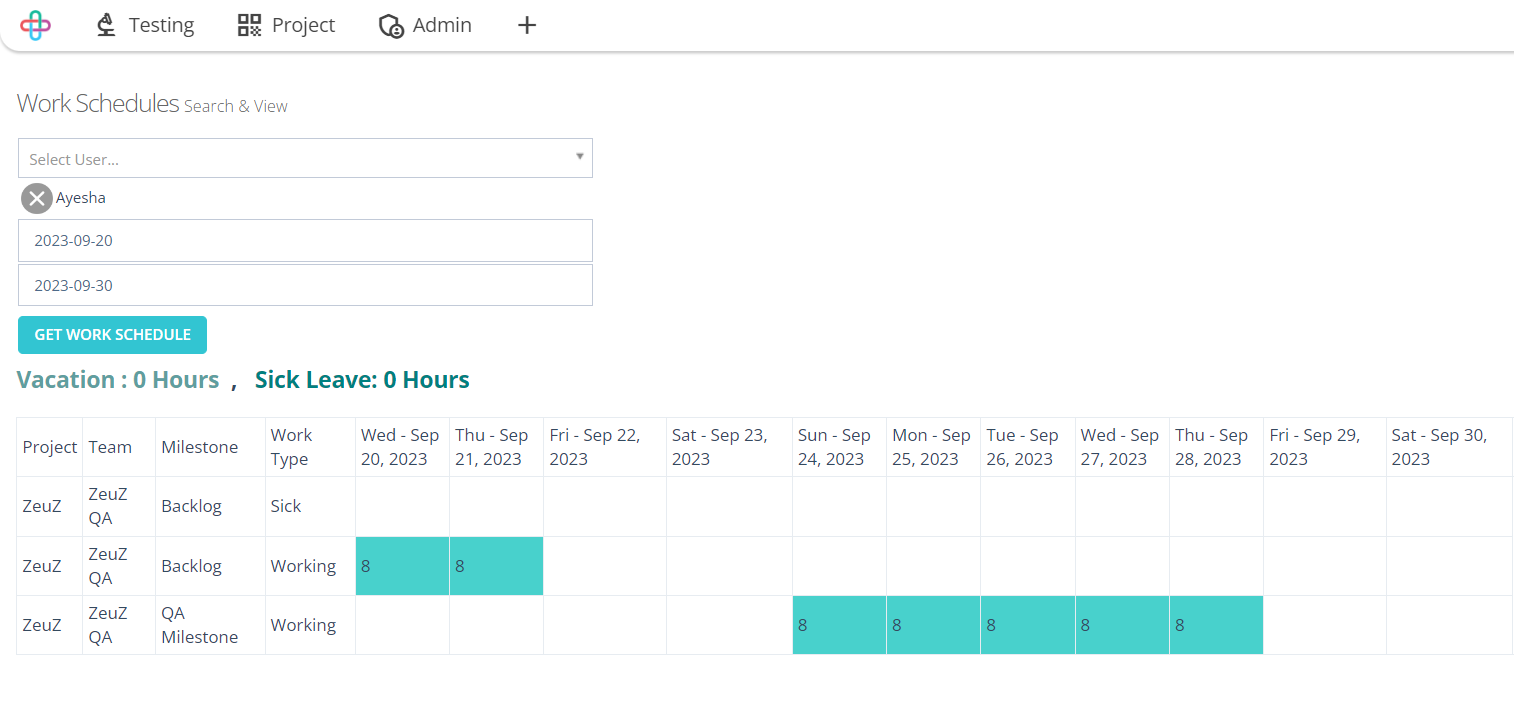
- Click on the GET WORK SCHEDULE button.
The GET WORK SCHEDULE button retrieves and displays the scheduled work hours for a specified user within the selected date range, facilitating resource management and workload tracking.