Setup android for automation
Setup android for automation refers to the process of configuring an Android environment to enable automation testing. This setup ensures that test scripts can interact with Android devices or emulators to perform automated actions, validate app functionality, and simulate user behavior.
Step 1:#
For Android setup, ensure the machine has at least 16 GB of RAM to prevent potential issues with running Android Studio.
Step 2:#
If the computer's username contains spaces, the Android setup script will not function properly.
| Username | Valid? |
|---|---|
| Asus Laptop | No |
| Asus_Laptop | Yes |
Example#
If the username of the current Windows profile is Asus Laptop, you need to change that to, let's say, Asus_Laptop in your profile and C:\Users\Asus_Laptop directory, and also update it in the environment variables. If you cannot do it, simply create another user and start working with that account.
Step 3:#
If you have Java installed on your machine, which is a version other than 1.8, it is better to uninstall that Java and then reinstall Java 1.8 from the provided link below:
Step 4:#
Download and install Node.js.
https://github.com/AutomationSolutionz/Zeuz_Python_Node/releases
While installing Node.js, it will ask whether to install additional tools and libraries
(Chocolatey and Visual C++ runtime)- make sure to skip those.
Installing Chocolatey automatically installs another version of Python, which will conflict with the existing Python setup.
Step 5:#
Download and install Android Studio from the link below:
https://developer.android.com/studio
You must run Android Studio once. It will download additional tools for Appium to work.
Quit this installer and close all other programs.
Wait for all Android Studio components to finish downloading and installing. It will take some time.
Step 6:#
Set some Environment Variables.
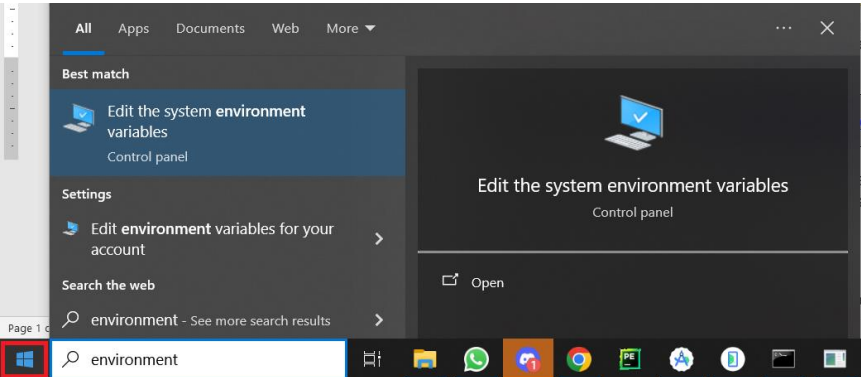
- Click the Windows button, type environment variables, and then open it.
- Now, you need to set some Environment Variables.
- While setting environment variables, you will notice two panes:
- User Variables (only for the current user)
- System Variables (for all users).
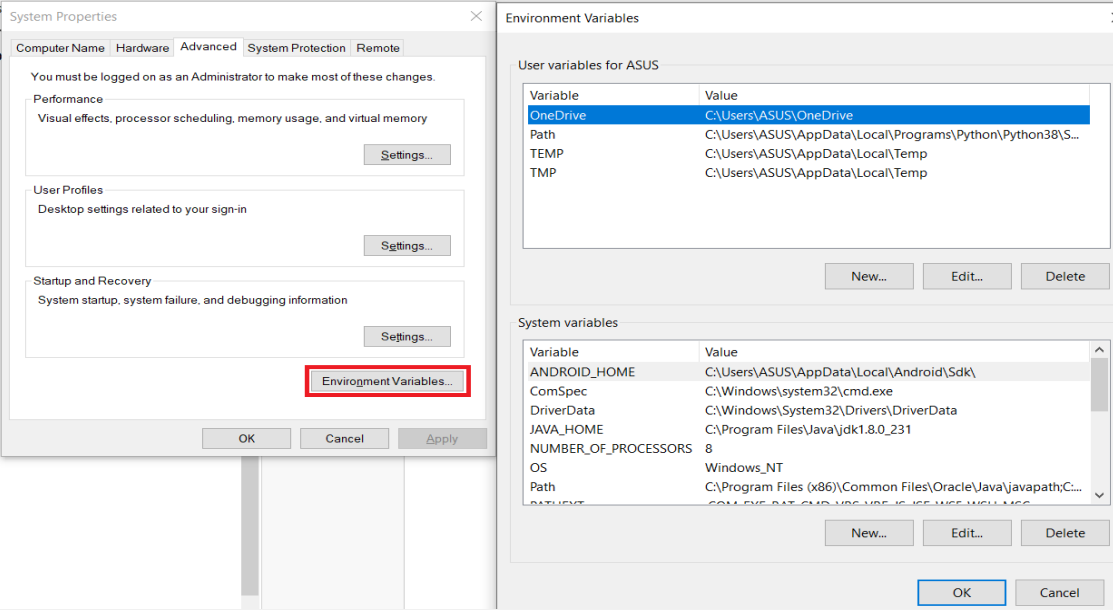
You need to set the variables for all users.
JAVA_HOME = C:\Program Files\Eclipse Adoptium\jdk-8.0.322.6-hotspot
(It's usually like this when you install Java from the link above).
ANDROID_HOME = C:\Users\YOUR_PC_USERNAME_HERE\AppData\Local\Android\Sdk
(Substitute YOUR_PC_USERNAME_HERE with the appropriate user's folder).
Inside the path, you need to edit and add three paths.
%ANDROID_HOME%\tools
%ANDROID_HOME%\tools\bin
%ANDROID_HOME%\platform-tools
Step 7:#
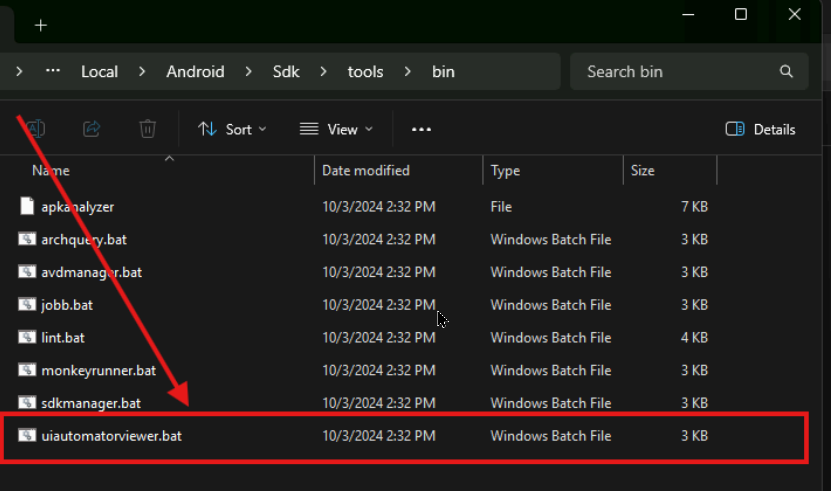
To inspect elements, run uiautomatorviewer.bat from the path:
%ANDROID_HOME%\tools\bin.
It is better to create a desktop shortcut for this.
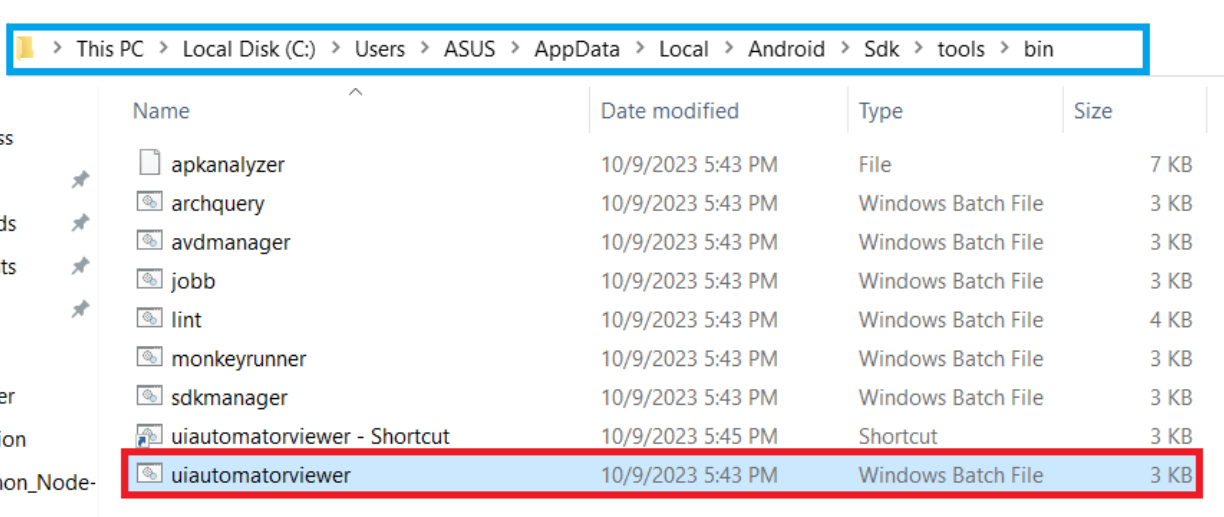
You can use the directory marked in blue, then create a shortcut for the red-marked uiautomatorviewer.bat and keep it on the desktop for future use.
AppData is hidden by default, so make hidden files visible to access it this way.
Sometimes, when launching uiautomatorviewer.bat, it may crash.
The solution is to run adb kill-server from the command prompt and then re-run uiautomatorviewer.bat.
Step 8:#
HAXM Installer:
Sometimes, you may need to activate HAXM from,
Android_Setup > Tools > SDK Manager > Android SDK > SDK Tools > Intel x86 Emulator Accelerator (HAXM Installer).
And install HAXM from,
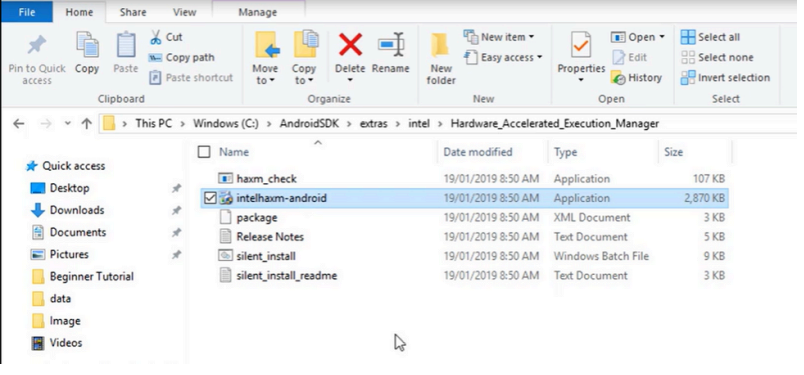
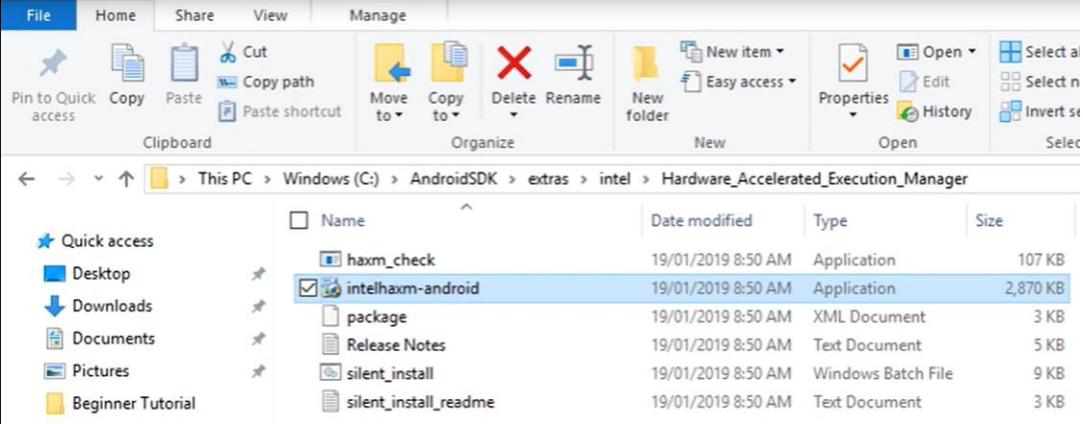
C:\AndroidSDK\extras\intel\Hardware_Accelerated_Execution_Manager\intelhaxm-android.
Sometimes, you may need to activate Intel Virtualization Technology from the BIOS.
Step 9:#
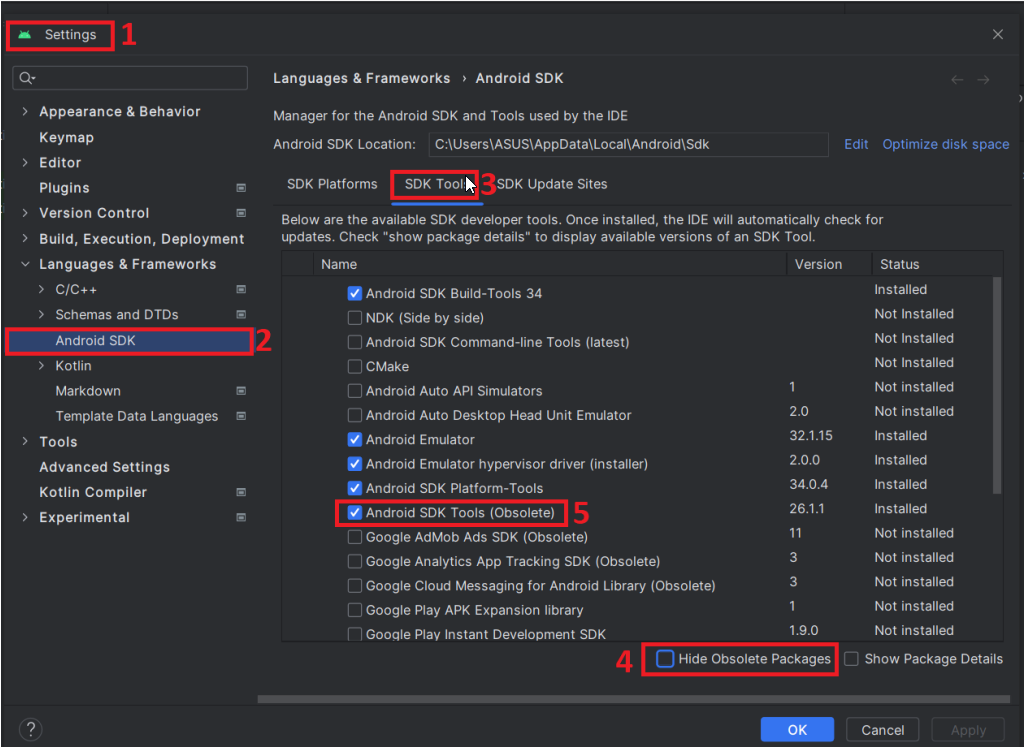
Sometimes, in newer versions of Android Studio, there is no tools folder in the SDK folder. Here's how to enable it.
- Launch Android Studio
- Launch SDK Manager
- Go to SDK tools tab, and uncheck the Hide Obsolete Packages
- Find and check / tick Android SDK Tools(obsolete)
- Click Apply.
Step 10:#
Make sure to use the updated version of ZeuZ node from this link.
https://github.com/AutomationSolutionz/Zeuz_Python_Node/releases If it's already downloaded, you don't need to download it again.
For testing the Application in Android we need a Virtual device or Emulator.#
Step 1:#
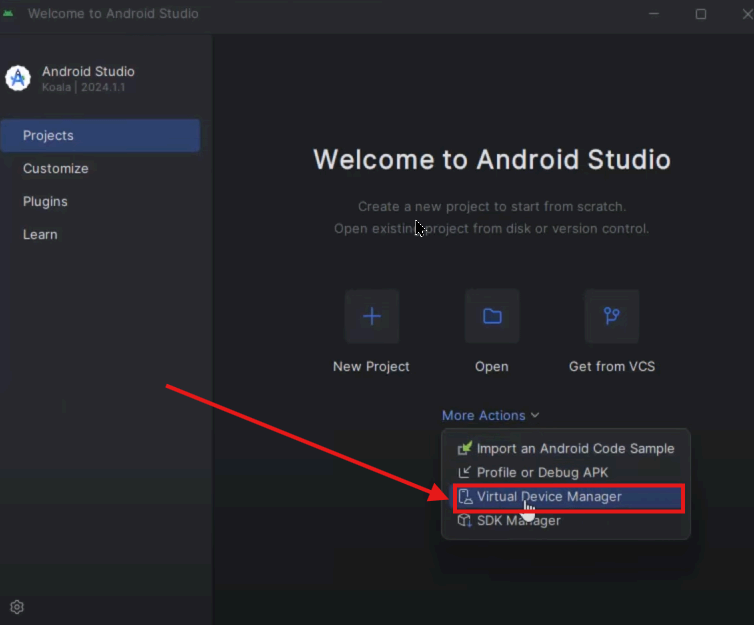
First, click the icon shown below
Step 2:#
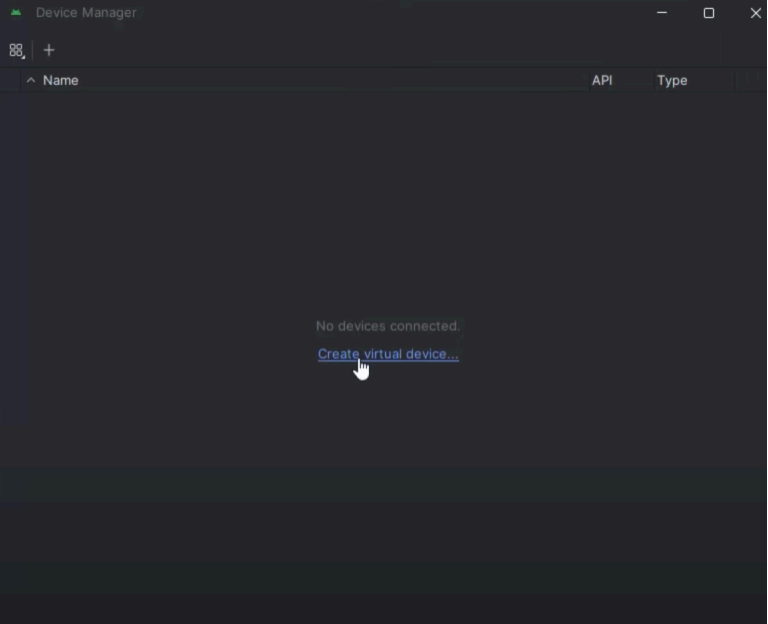
Click on Create Virtual Device.
Step 3:#
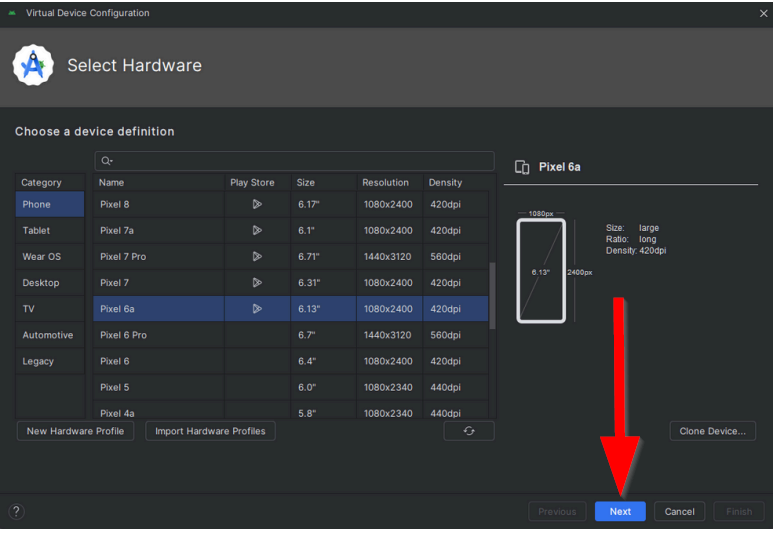
Select the device and then click the Next button.
Step 4:#
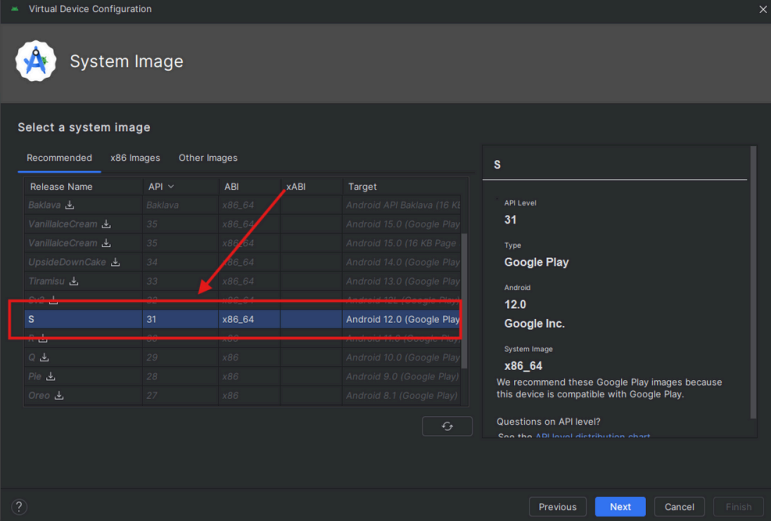
Select a system image.
Step 5:#
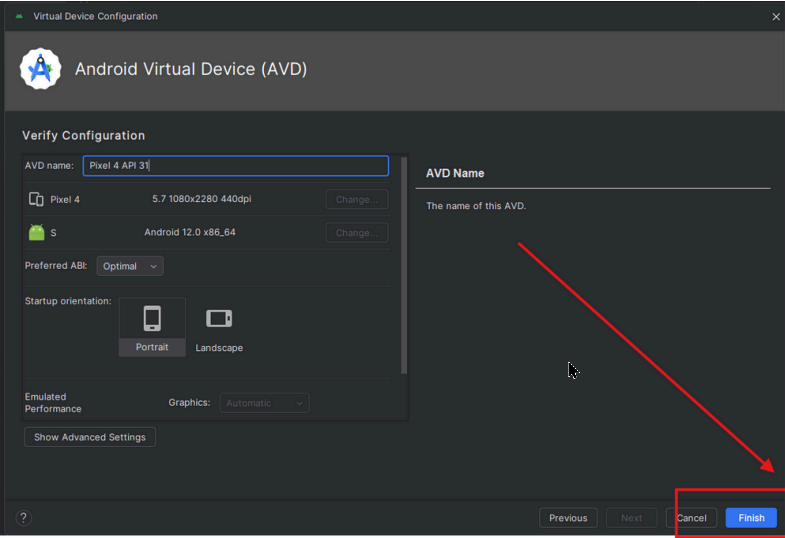
Click the Finish button to create a new device.
Step 6:#
Click the Play icon to start the newly created device.

To inspect elements, we need to run uiautomatorviewer.bat from the path Android "uiautomatorviewer".
(It should be in C:\Users\PC_USER_NAME\AppData\Local\Android\Sdk\tools\bin)
Install Appium, open the command prompt and run the commands below one by one and install appium and uiautomator node-package-manager by executing the following commands-
npm i --location=global appiumappium driver install uiautomator2HAXM Installer: Sometimes we need to activate HAXM from
"Android_Studio>>Tools>>SDK Manager>>Android SDK>>SDK Tools>>Intel x86 Emulator Accelerator (HAXM installer)". And install HAXM"C:\AndroidSDK\extras\intel\Hardware_Accelerated_Execution_Manager\intelhaxm-android". Sometimes we need to activate"Intel Virtualization Technology"from BIOS.
