How to create Schedule
Description#
Importance of Scheduler in the context of test cases and presets#
In the context of test cases and presets, a Scheduler plays a crucial role in streamlining and automating test execution. This automation ensures that test cases are executed at specific times or under particular conditions, reducing manual effort and the risk of human error. Additionally, scheduling enables testing teams to perform tests at optimal times. It also helps maintain a consistent and organized testing workflow, enhancing efficiency and allowing for the seamless integration of tests into the development pipeline.
Overall, a Scheduler in the context of test case presets enhances testing efficiency, reliability, and integration within the software development lifecycle.
Steps#
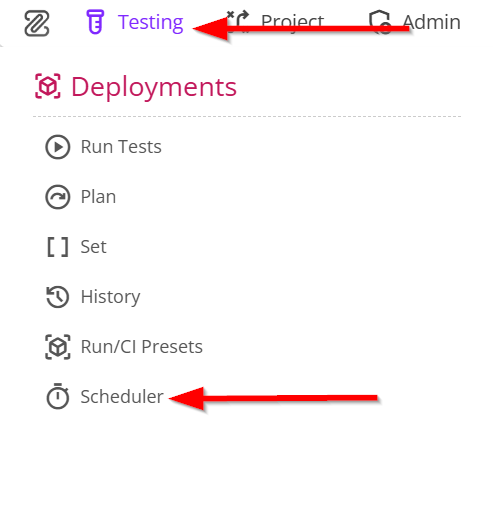
- From the Menu bar, navigate to Testing and then select the Scheduler option.
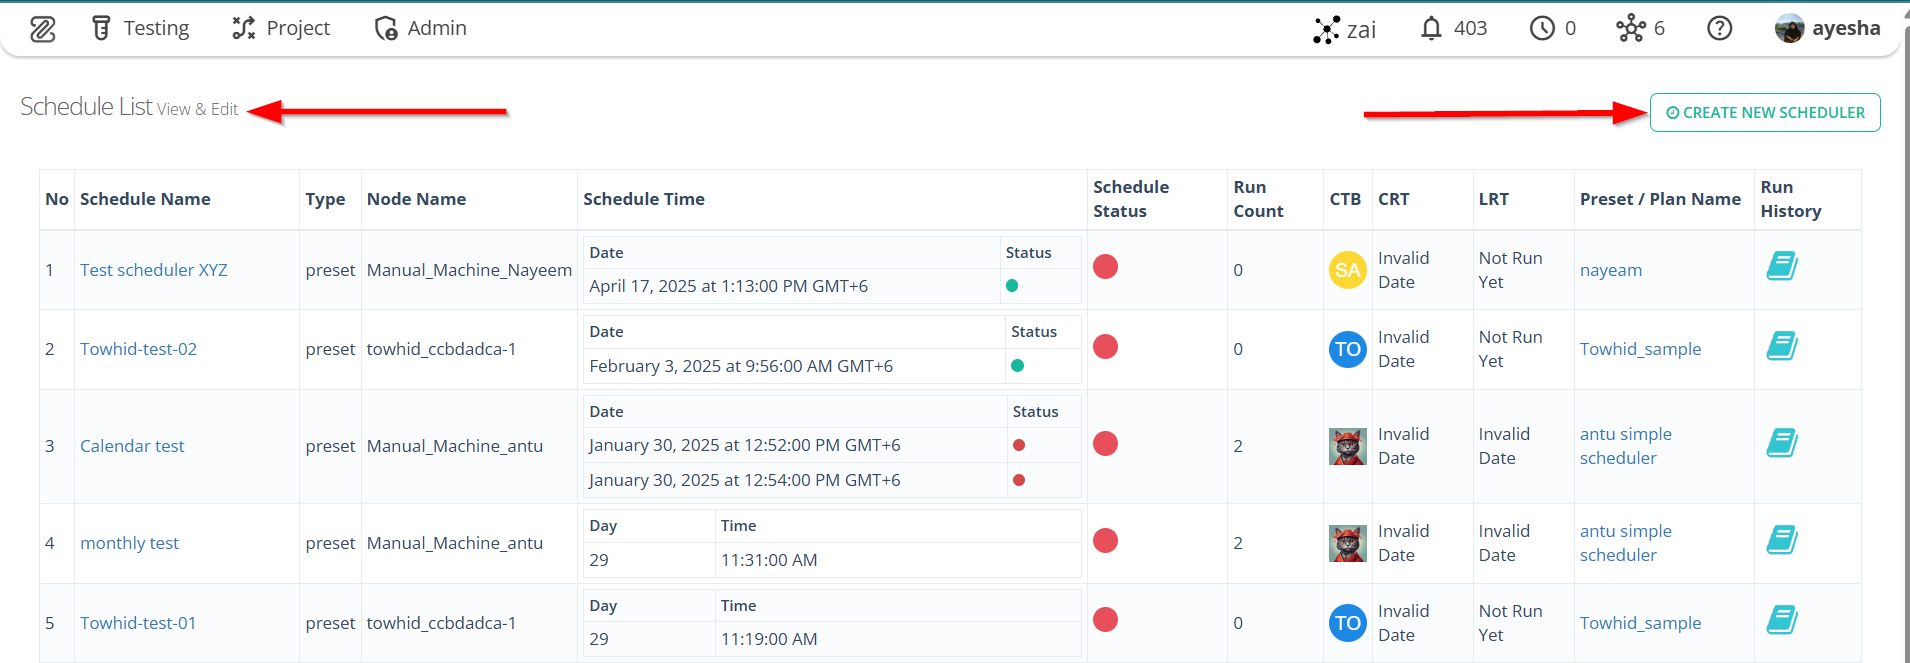
- Navigate to the Schedule List page.
- Click the CREATE NEW SCHEDULER button.
The CREATE NEW SCHEDULER button is used to set up and configure a new Schedule for running test cases at specified intervals or times in software testing.
- Navigate to the Create Schedule page.

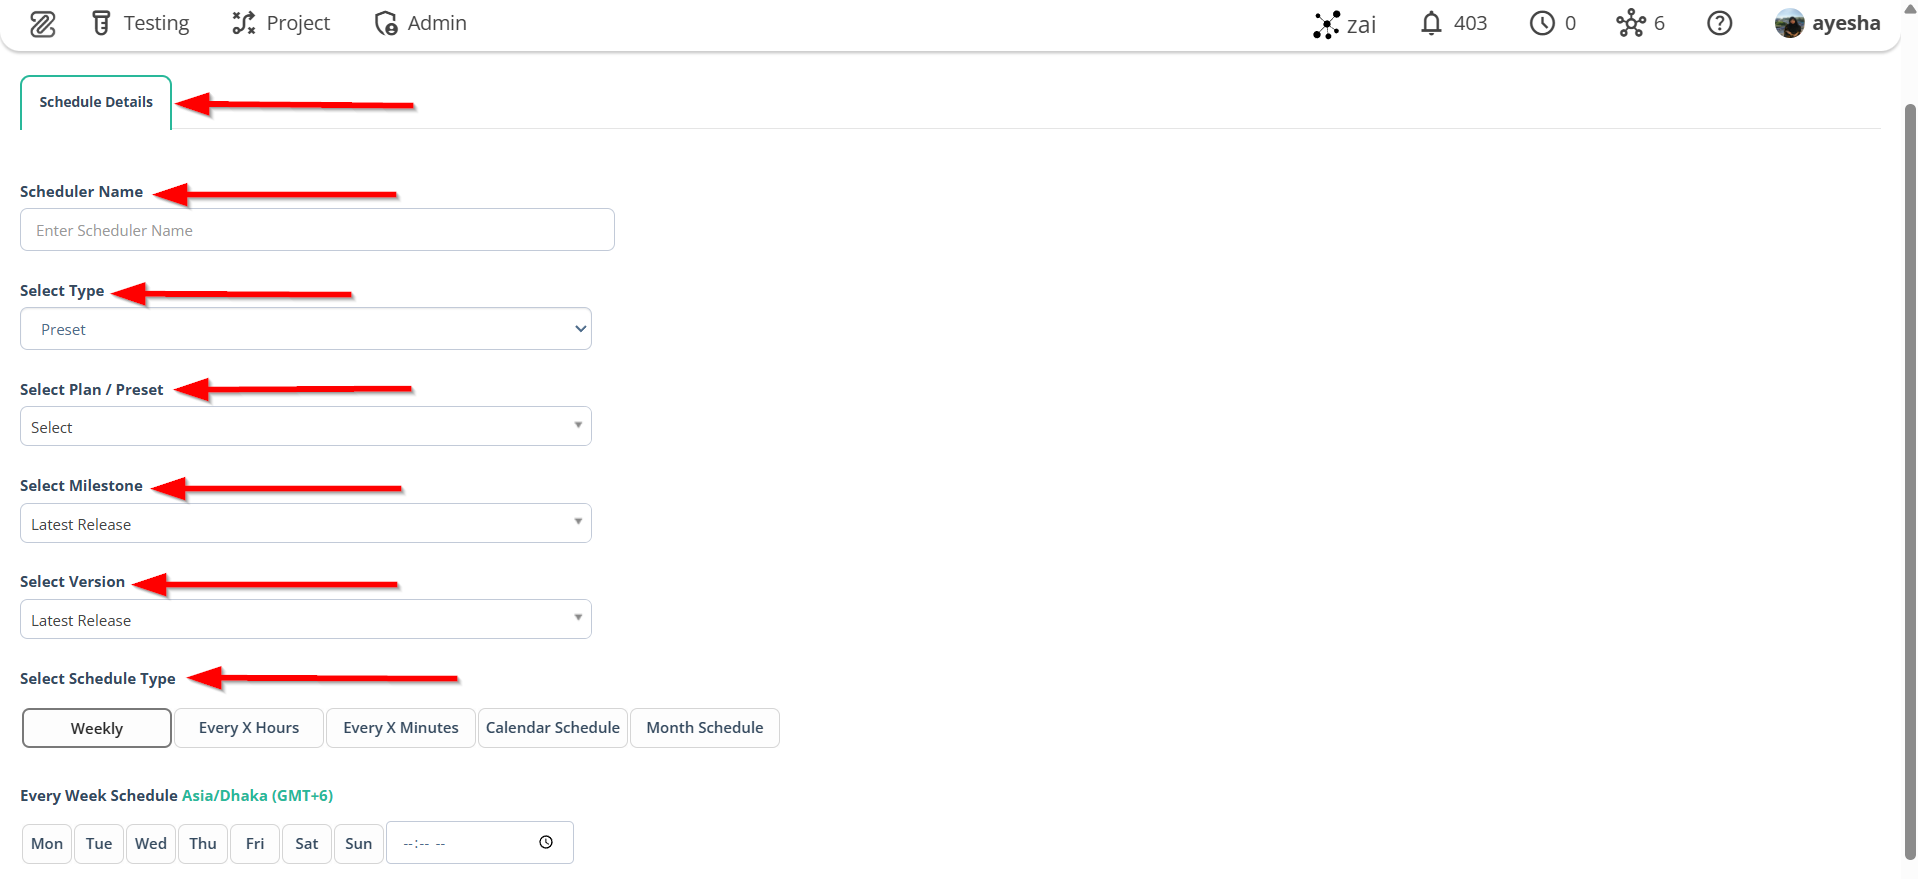
Complete the following fields in the Schedule Details tab, such as:
- Scheduler Name
- Select Type
- Select Plan / Preset
- Select Milestone
- Select Version
- Select Schedule Type.
Scheduler Name: The Scheduler Name is necessary to uniquely identify and manage different different schedules for running test cses.
Select Plan / Preset: Selecting a Plan / Preset ensures consistent and efficient test execution by using predefined test configurations and reducing manual setup.
Select Milestone: Selecting a Milestone is necessary because it defines the scope, organizes tasks, tracks progress, manages dependencies, and ensures efficient efficient resource allocation. It helps the scheduler focus on relevant activities tied to a specific project phase or goal.
Select Version: Selecting a Version ensures the scheduler runs tasks specific to the correct release, maintaining accuracy, consistency, and efficiency while avoiding irrelevant or outdated tasks.
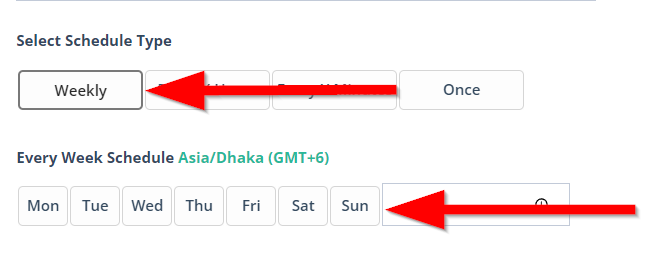
Select Schedule Type: Selecting the Schedule Type is necessary to define how often and when the test cases should be executed.- Weekly: Running test cases Weekly in the scheduler ensures consistent and periodic validation of software quality overtime in software testing.
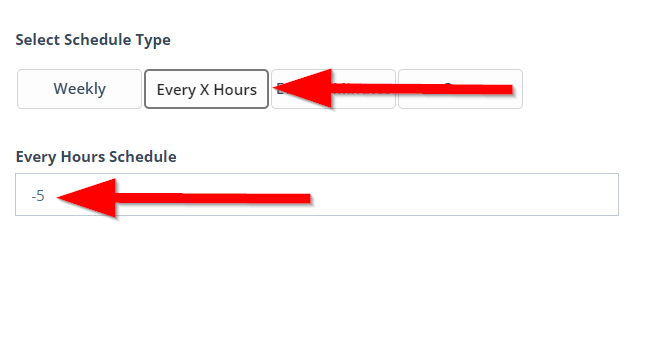
- Every X Hours: Running test cases Every X Hours in the scheduler allows for frequent and automated testing, ensuring that issues are quickly identified and addressed in software testing.
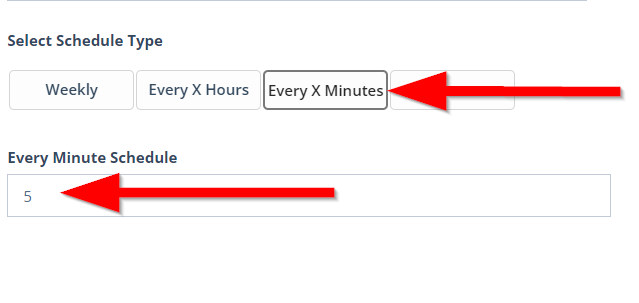
- Every X Minutes: Running test cases at re regular intervals, such as every Every X Minutes, help ensures continuous monitoring and early detection of issues in the software, contributing to its stability.
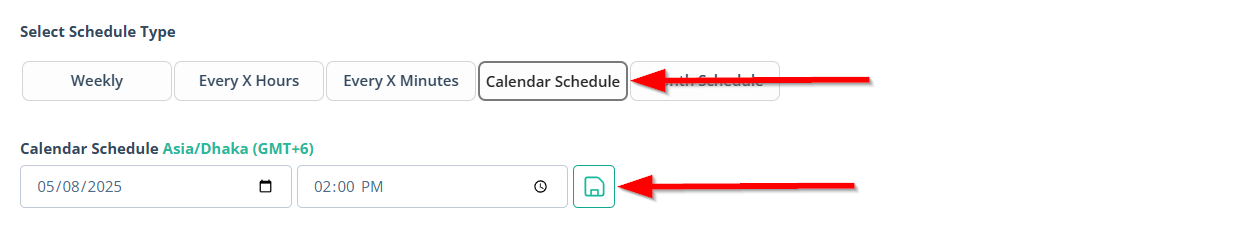
- Calendar Schedule: It is a type of schedule that allows test executions to be planned on specific dates and times using a calendar interface.
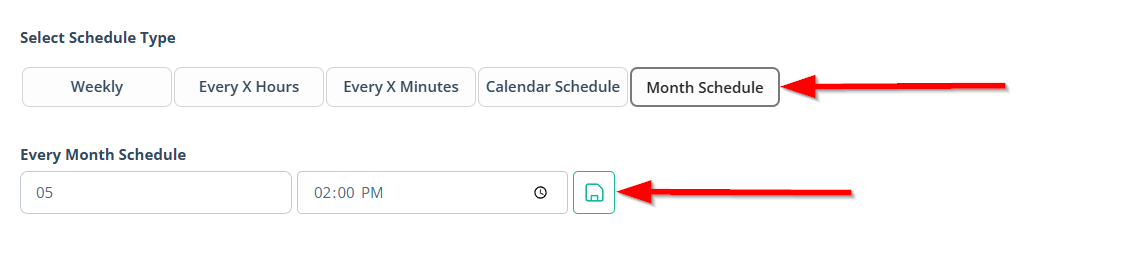
- Month Schedule: It is a type of schedule that allows test executions to be set up on specific days within a month.
note
- If the Schedule Type is set to Weekly, the test cases will run every week.
- If the Schedule Type is set to Every X Hours, the test cases will run every X hours and for this it is necessary to set the required hour.
- If the Schedule Type is set to Every X Minutes, the test cases will run every X minutes and for this it is necessary to set the required minute.
- If the Schedule Type is set to Calendar Schedule, the test cases will run automatically based on the specific dates and times defined in the calendar interface.
- If the Schedule Type is set to Month Schedule, the test cases will run based on a monthly timeline.
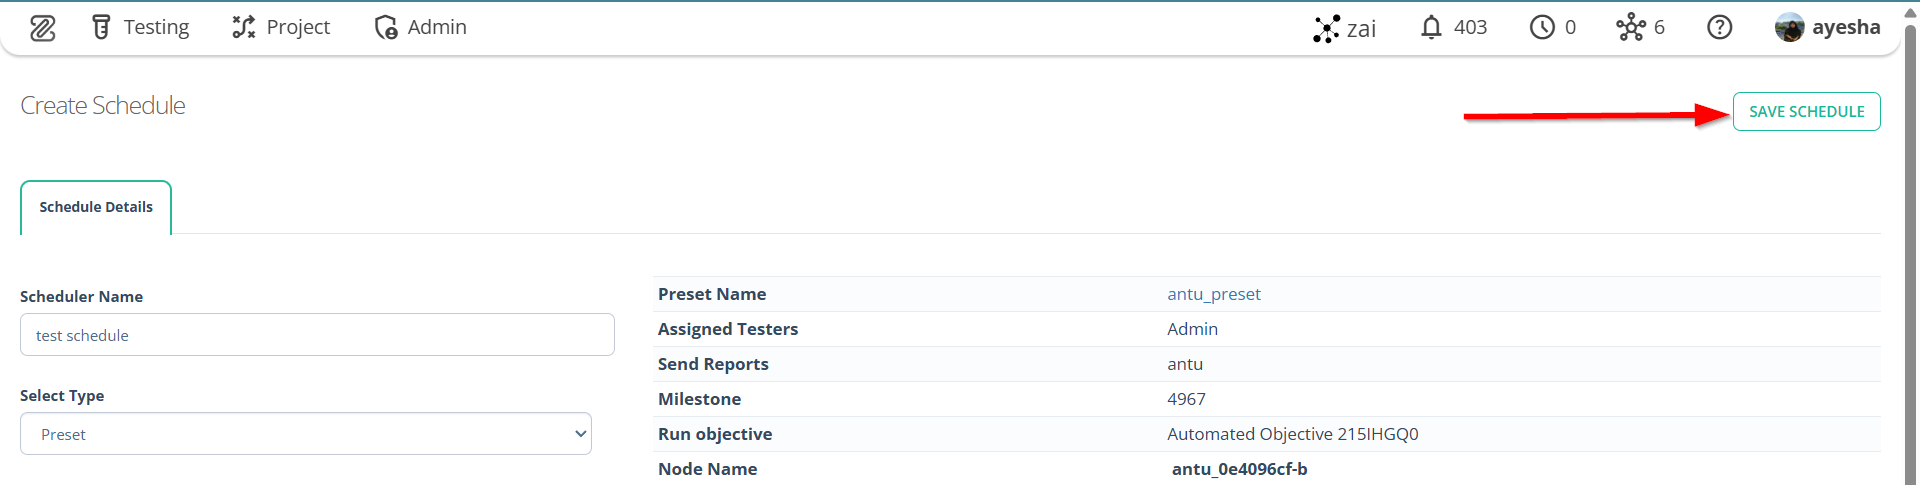
- After filling in the required information in the Schedule Details tab, the relevant details will be displayed.
Displaying the filled Schedule Details provides a confirmation and allow users to review the scheduled parameters before finalizing the setup.

- Click the SAVE SCHEDULE button.