How to create Webhook for CI/CD
Description#
What is Webhook in the context of CI/CD?#
In the context of CI/CD (Continuous Integration/Continuous Delivery), a Webhook is a mechanism that allows different systems or services to communicate and trigger actions based on events or updates.
Specifically, a Webhook is a user-defined HTTP callback or endpoint that receives notifications or data payloads from a remote server when a particular event occurs. These events can vary depending on the CI/CD platform or tool being used but typically include actions such as code commits, pull requests, builds, test results or deployment completions.
When a Webhook is set up, the CI/CD platform will send an HTTP POST request to the specified URL whenever the associated event occurs. The payload of the request usually contains relevant information about the event, such as the commit details, branch information, or build status.
Webhooks are commonly used in CI/CD workflows to automate processes and enable integrations with other tools and services. For example, when a code commit occurs in a version control system (e.g. Git), a Webhook can be configured to trigger an automatic build and deployment processes in a CI/CD tool (e.g. Jenkins, Travis CI, or Gitlab CI/CD). This helps steamline the development and release pipeline by automatically initiating subsequent stages based on specific events.
By leveraging webhooks, CI/CD pipelines can be designed to respond to changes in real-time, ensuring rapid feedback, faster deployments, and increased overall efficiency.
What is the necessity of Webhook in the context of CI/CD?#
Webhooks are essential in CI/CD workflows for real-time notifications, automation, integration, collaboration, and establishing a continuous feedback loop. They enable immediate notifications, automate actions based on events, integrate various tools and services, foster collaboration among teams, and facilitate a continuous flow of information and feedback.
Webhook enhance the efficiency and reliability of CI/CD pipelines, leading to faster and streamlined software development and delivery.
Steps#
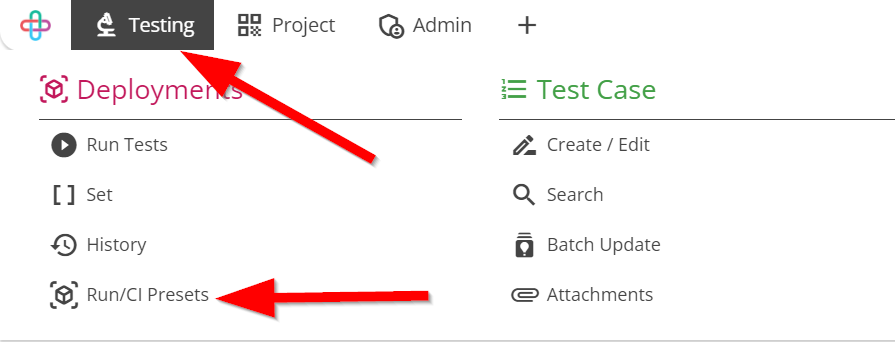
- From the Menu bar, go to the Testing then Run/CI Presets option.

Go to the Preset page.
A Preset page refers to a preconfigured or predefined test page that serves as a starting point for conducting specific tests or simulations.
The Preset page has a table named View/Edit Preset which contain the following informations like:
- Preset Name
- Created By
- Modified By
- Created On
- Modified On
- Webhook ID
- Webhook URL
- Curl Command
- Delete.
Click on the Create New Preset + button.
Create New Preset button allow users to generate a new preconfigured template or settings for conducting tests or simulations with specific parameters.

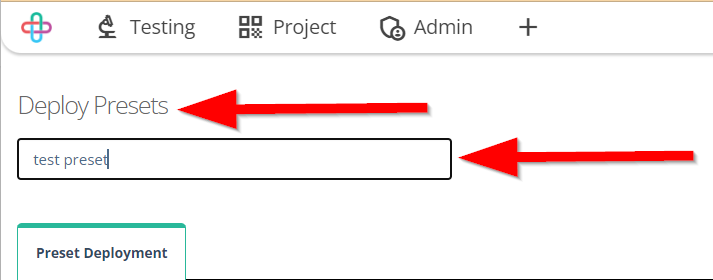
- Go to the Deploy Presets page.
The function of Deploy Presets page is to manage and apply preconfigured settings or configurations to relevant test scenarios for streamlined and standerdized testing processes.
- Enter the Preset Name.
Entering the Preset Name is necessary for easy identification and categorization of preconfigured settings, ensuring clarity and organization in managing various test scenarios.

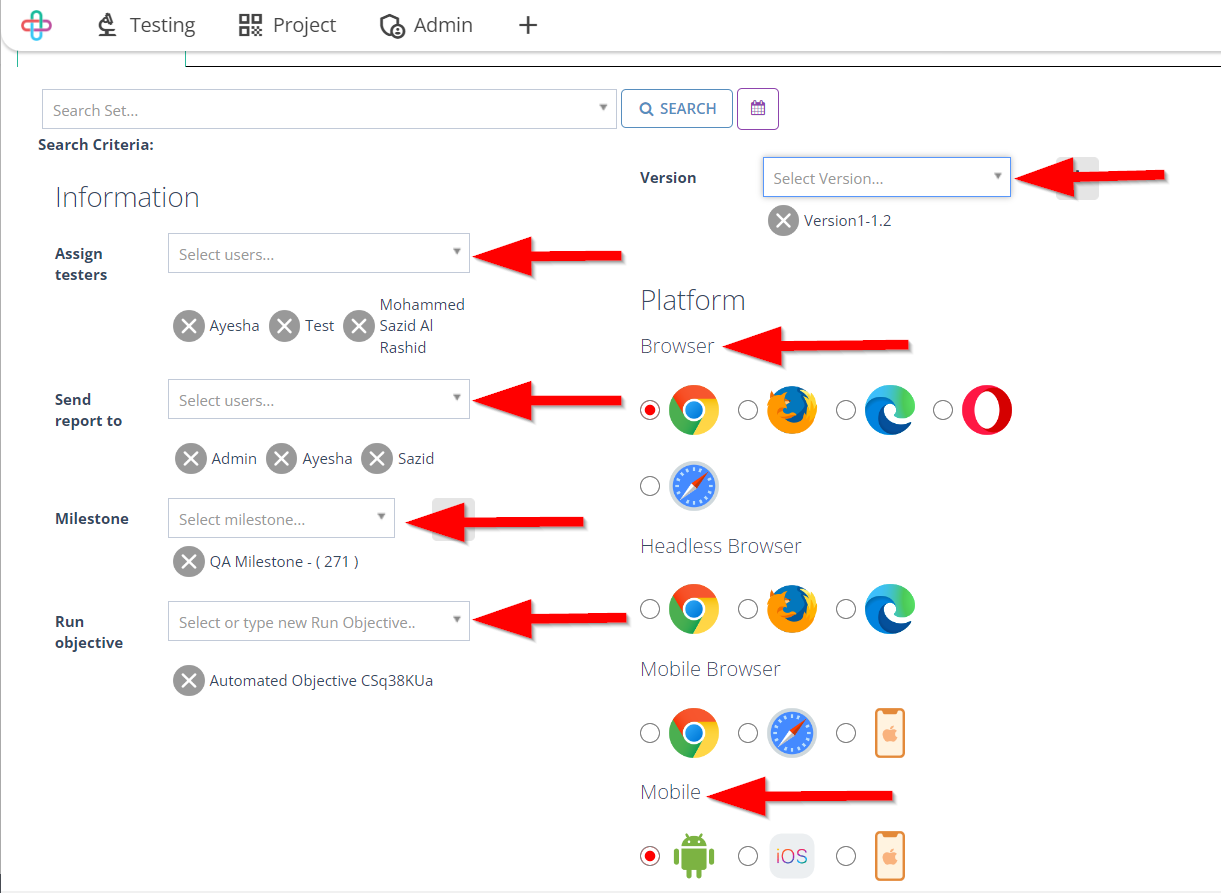
- Click to Search Set of the Preset Deployment tab.
- Click on the Search button.
In the Preset Deployment tab, the Search Set allows users to filter and display specific preconfigured settings, making it easier to locate and apply the desired presets to relevant test scenarios.

- Fill up the Information of the Preset Deployment tab like:
- Assigned testers,
- Send report to,
- Milestone,
- Run Objective,
- Version
- Platform (Browser, Mobile).

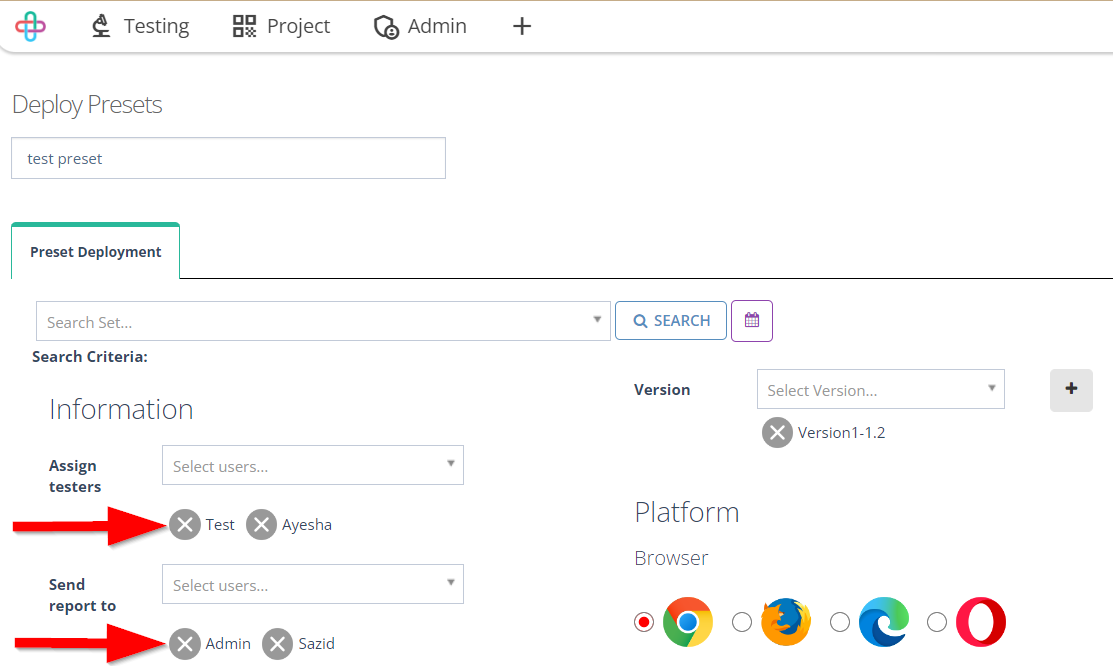
Multiple of Assigned testers and Send report to can be selected.
To remove any Assigned testers or Send report to, click on the Cross sign (X) button.
Assigned Testers refers to the individuals or team members who are granted access to and can utilize specific preconfigured settings for executing tests or simulations.
Send report to indicates the designated recipents or stakeholders who will receive the test results and findings generated using the preconfigured settings after testing is completed.
Selecting multiple of Assigned testers and Send report to in terms of presets allows for efficient distribution of testing responsibilities and comprehensive communication of test results to various team members and stakeholders, ensuring a coordinated and thorough testing process.
Removing any Assigned testers and Send report to may be necessary to update or reassign testing responsibilities and recipents, ensuring the most relevant and up-to-date individuals receive the test tasks and results.

- Click on the Save button.
