Create Test Plans
Description#
Importance of creating Test Plans#
Creating Test Plans is vital as it provides a detailed framework, delineating the testing objectives, methodologies, schedules, and resources needed to ensure efficient, systematic, and comprehensive testing of software applications. This formalized document acts as a guide, helping teams align on the testing goals, approach, and methodologies, ensuring thorough and effective testing practices, which, in turn, contribute to the delivery of high-quality software.
Description of Test Plan page#
- From the Menu Bar, navigate to Testing, then select Plan option.

- Navigate to the Test Plan page.
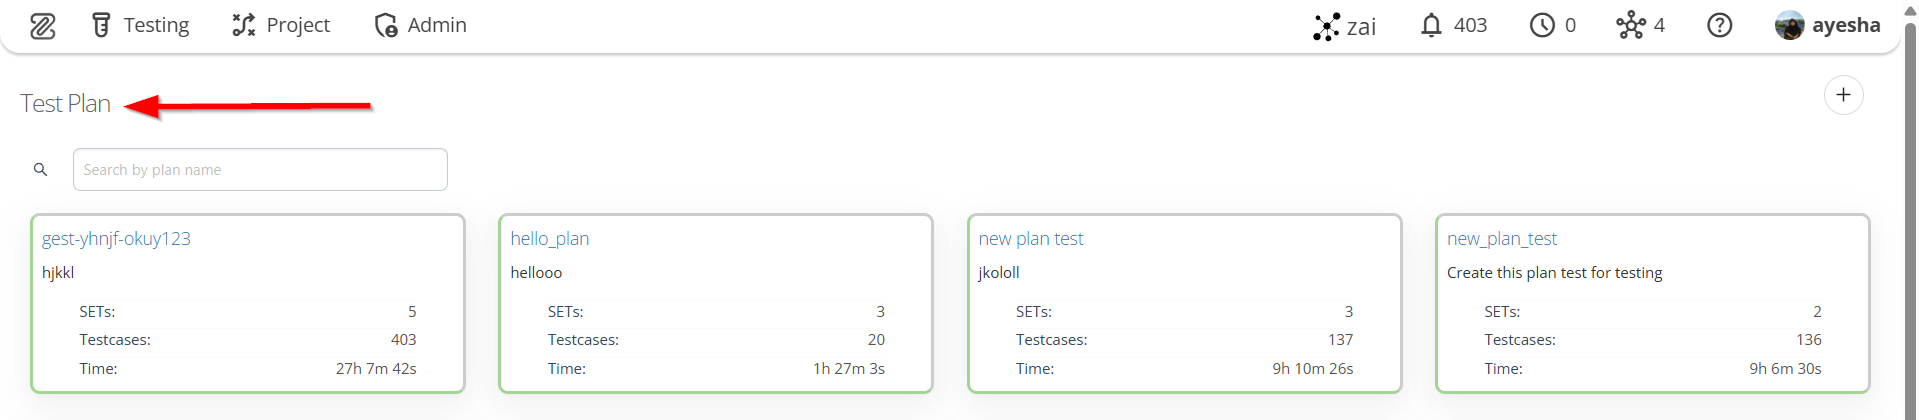
- The Test Plan page displays the following options, such as:
- Create new plan
- Search plans
- Test plan cards.

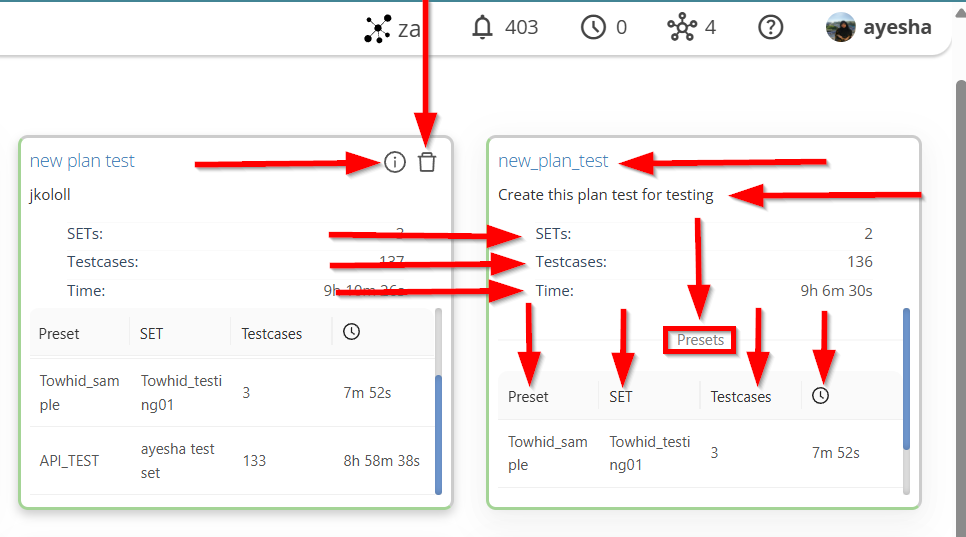
- When a test plan card is clicked, the following information will be displayed:
- Plan Title
- Description
- Created By and Created At
- Delete button
- SETs
- Testcases
- Time
- Preset Information
- Preset Name
- SET Name
- Count of Testcases
- Duration.
How to create a Test Plan#
Steps#
To create a Test Plan, click the + Create new plan button.
The + Create new plan button initiates the creation of a new test plan, facilitating efficient organization and documentation of testing activities in software testing.
Enter the Plan Title as well as Description of the plan.
Entering the Plan Title and Description are necessary to provide a clear and descriptive outline of the testing project.
The Plan Title serves as an identifier, helping testers and stakeholders quickly understand the purpose or focus of the testing effort.
The Description offers detailed insights into the scope, objectives, and key features of the test plan, ensuring that all team members have a common understanding of the testing strategy.Click the Create Plan button.

Click on the created Test Plan and add the required Presets.
Adding required Presets are necessary to establish standardized configurations, settings, and criteria, ensuring consistency, efficiency, and reliability across the testing process. Presets facilitates an uniform testing environment, reducing the likelihood of errors and streamlining the testing workflow by eliminating the need for manual configuration before each test. This practice not only enhances the repeatability of test scenarios but also promotes a cohesive testing approach. In summary, incorporating presets into the test plans is essential for maintaining a standardized, efficient, and error-resistant testing process in software development.
Click the Add tab on the Test Plan page.
Select the required Presets.
Selecting required Presets in test plans ensures a standardized, efficient, and error-resistant testing process by establishing consistent configurations and settings.
To add the required Presets, click the ADD SELECTED button.

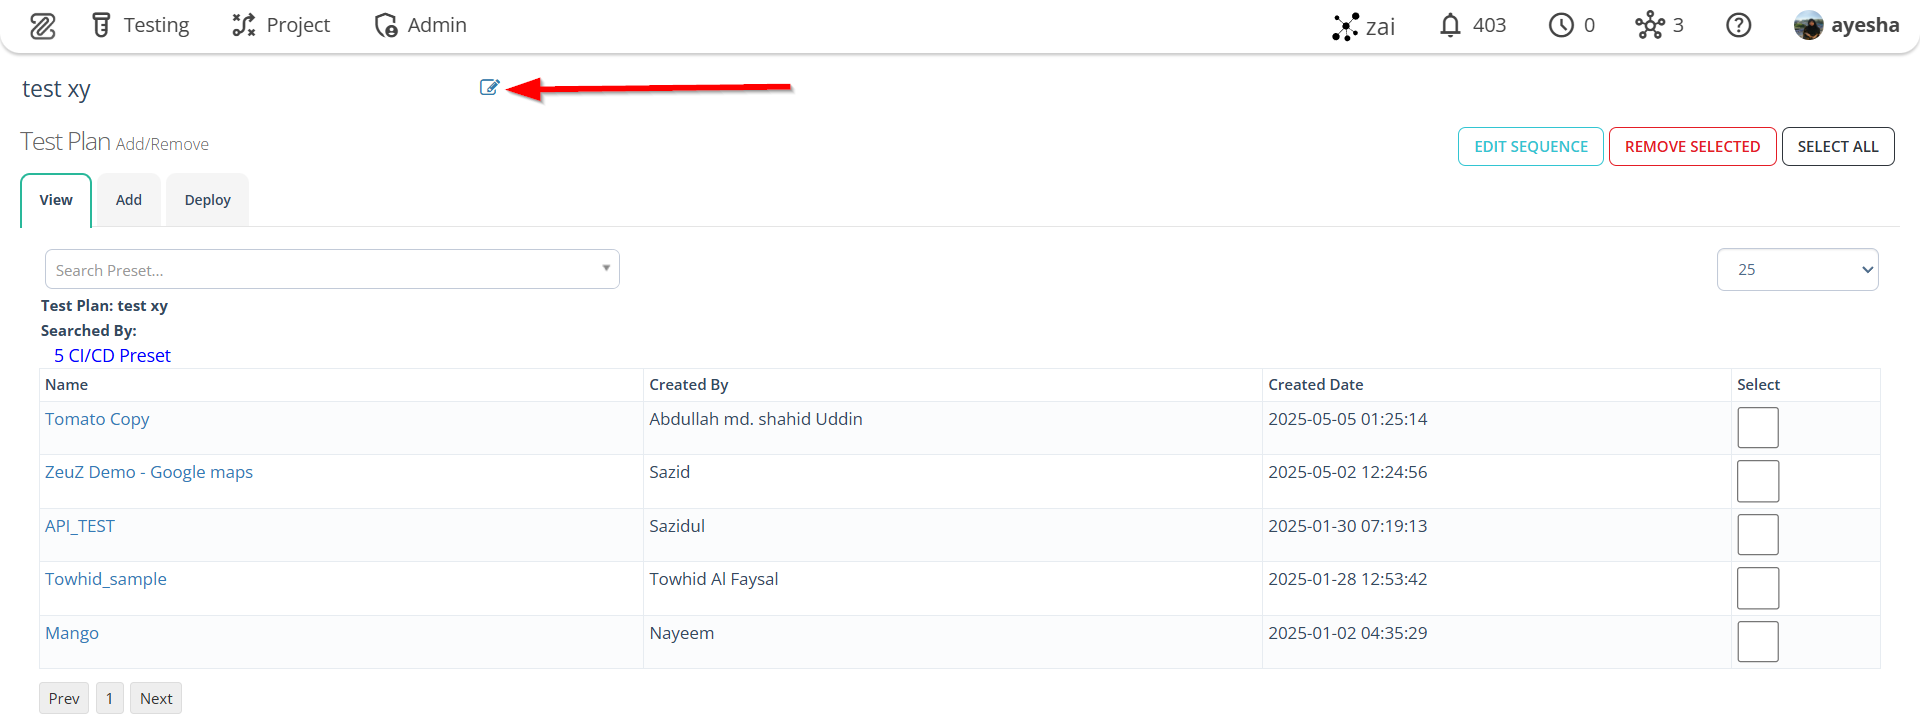
- To verify whether the required Presets have been added, click the View tab on the Test Plan page.

If it is necessary to edit the sequence of the Presets, click the EDIT SEQUENCE button.
After editing the sequence, click the SAVE button.


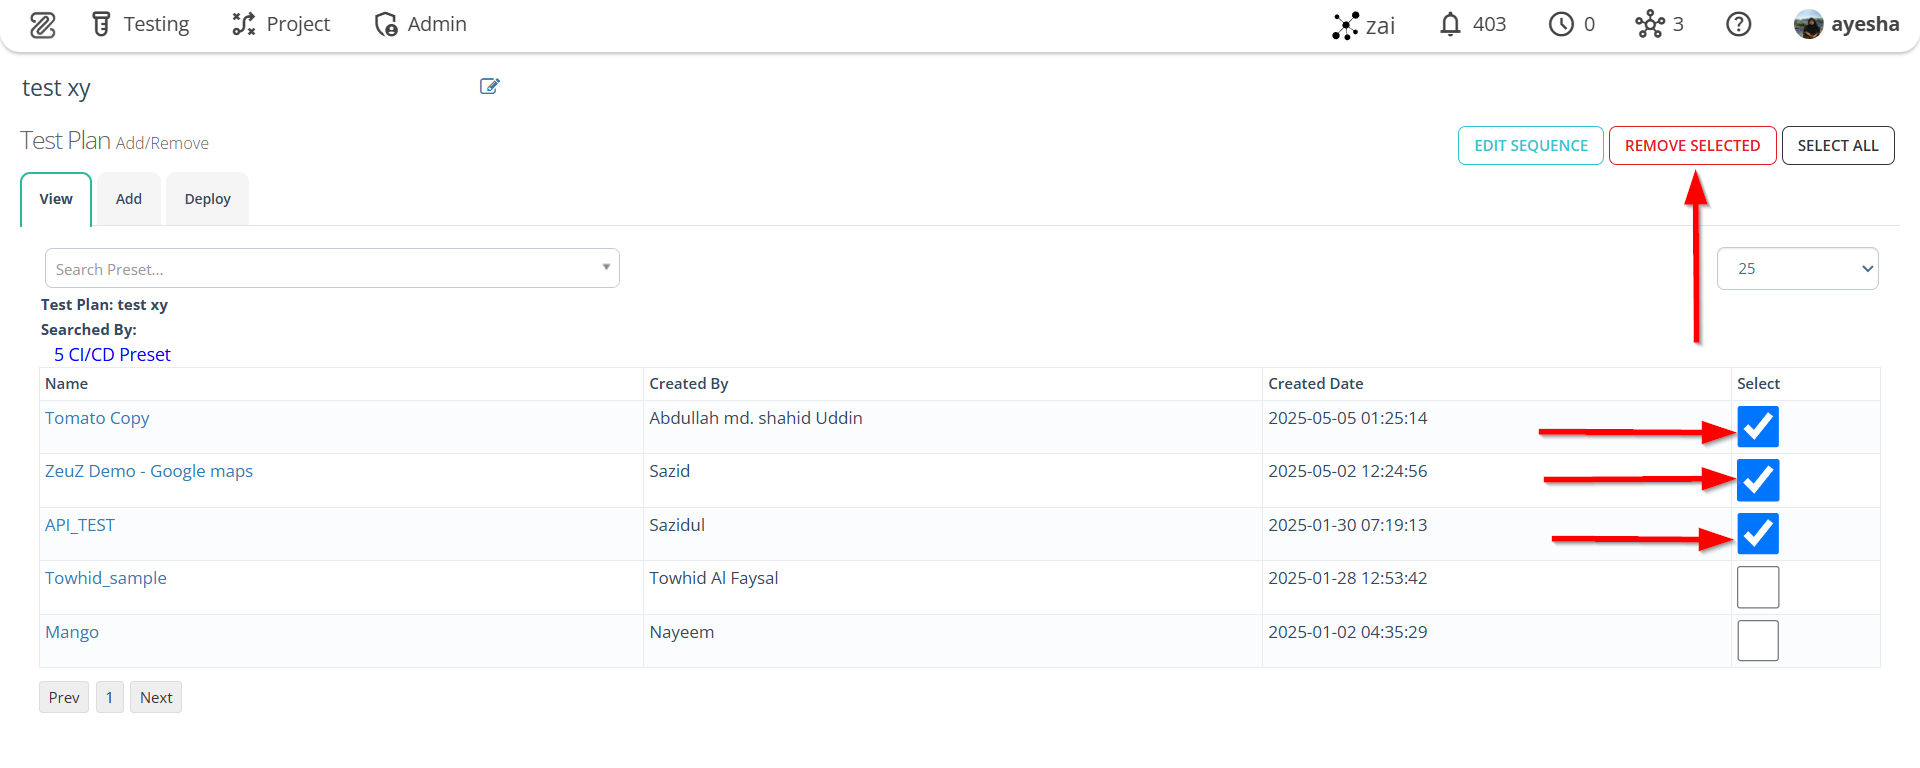
- If it is necessary to select all the Presets for the required Test Plan, click the SELECT ALL button of the Add tab.

- If it is necessary to remove any selected Test Plan from the View tab, click the REMOVE SELECTED button.
- If it is necessary to rename the Test Plan title, click the Edit button next to the title on the Test Plan page.